

It’s wonderful you want to sew a dress for a 2-3 year old! This age group is perfect for adorable, relatively simple designs that allow for growth and comfort. For a child this age, ease of wear, durability, and a bit of room to move are key.
This guide will focus on a simple A-line or shift dress design, which is classic, comfortable, and relatively easy for a beginner to sew. We’ll include a simple elasticized neckline or back opening for easy dressing.
How to Cut and Sew a Baby Dress for a 2-3 Year Old
This detailed tutorial will guide you through creating a charming and practical dress, ideal for toddlers who are active and growing. We’ll prioritize comfort and ease of dressing.
I. Planning Your Baby Dress
Before you cut, a little planning ensures you get the right fit and look for your dress.
- Size: A 2-3 year old typically wears a size 2T or 3T. Toddler sizing is based more on height and weight. If possible, measure the child you’re sewing for, or refer to a standard size chart (many fabric stores or pattern companies offer these online).
- Key Measurements for 2-3T (Approximate):
- Chest: 20-21 inches (51-53 cm)
- Height: 33-36 inches (84-91 cm)
- Finished Dress Length: Typically knee-length, around 18-20 inches (46-51 cm) from shoulder to hem.
- Key Measurements for 2-3T (Approximate):
- Fabric Choice:
- Lightweight Woven Cottons are Best: Think quilting cotton, broadcloth, seersucker, lightweight denim, linen blends, or cotton poplin. These are breathable, easy to wash, and comfortable for a child.
- Avoid: Stretchy knits (unless you’re experienced with them), heavy fabrics, or anything that requires dry cleaning.
- Amount: 1 to 1.5 yards (0.9 to 1.4 meters) depending on fabric width and dress length.
- Opening Type:
- Elasticized Neckline (Easiest): A simple casing with elastic allows the dress to slip on over the head easily.
- Back Opening with Snaps/Buttons: A small slit at the back neck, closed with snaps or buttons, is also common. We’ll focus on the elasticized neckline for simplicity.
- Sleeve Style: Simple cap sleeves or sleeveless. Sleeveless is easiest!
II. Gather Your Materials
Having everything ready before you start will make the sewing process smooth.
- Fabric: 1 to 1.5 yards (0.9 to 1.4 meters) of chosen fabric (see above).
- Matching Thread: All-purpose polyester thread.
- Elastic: 1/2-inch (1.27 cm) wide non-roll elastic. You’ll need about 18-20 inches (46-51 cm) for the neckline.
- Basic Sewing Supplies:
- Sewing Machine
- Sharp Fabric Scissors or Rotary Cutter and Mat
- Quilting Ruler or Measuring Tape
- Fabric Chalk or Mark-B-Gone Pen
- Plenty of Pins or Fabric Clips
- Iron and Ironing Board
- Seam Ripper (everyone needs one!)
- Safety Pin or Bodkin (for threading elastic)
III. Create Your Pattern Pieces & Cut Your Fabric
Since this is a simple design, you can draft the pattern pieces directly on your fabric or on paper. We’ll use a 1/2-inch (1.27 cm) seam allowance throughout.
Pattern Piece Measurements (for approximate 2-3T size):
- Dress Front & Back (Cut 2: 1 front, 1 back):
- Width at Bottom: 18 inches (46 cm)
- Width at Top (Chest/Armpit): 11 inches (28 cm)
- Height (from shoulder to bottom hem): 20 inches (51 cm)
- Armhole Depth: 4.5 inches (11.5 cm) – measured from the top shoulder edge down the side.
- Neckline Drop:
- Front: 2 inches (5 cm) from the top edge at the center.
- Back: 1 inch (2.5 cm) from the top edge at the center.
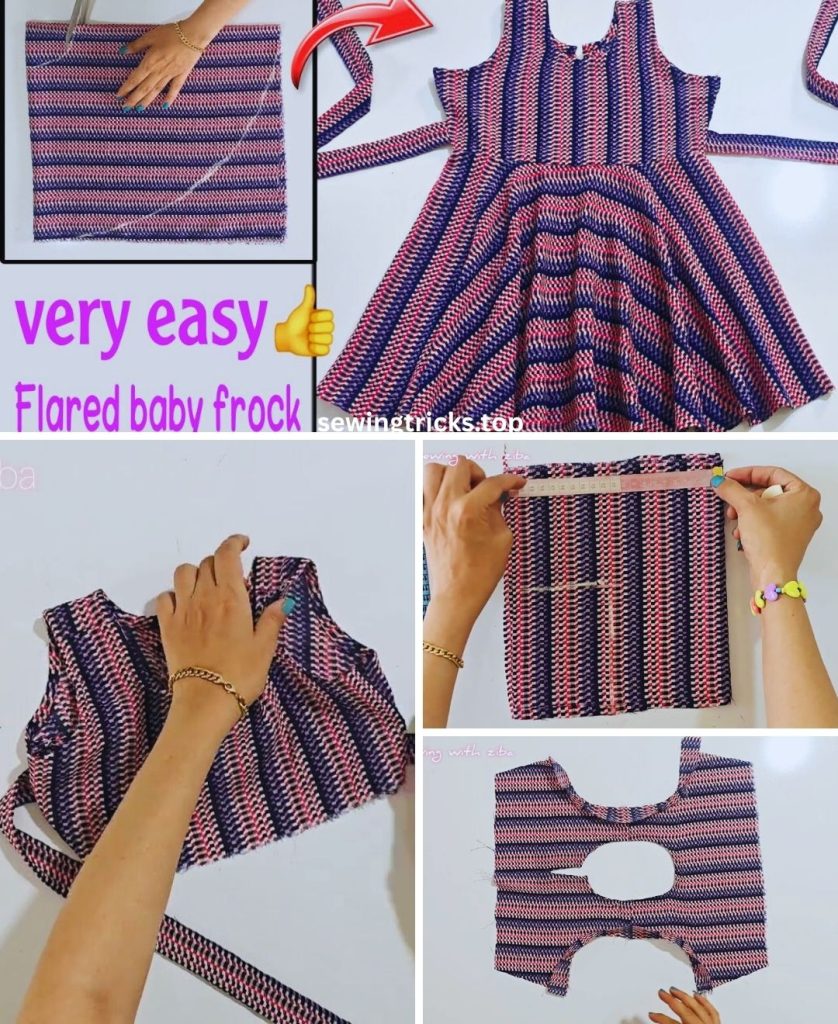
Drafting Instructions (on paper or directly on folded fabric):
- Fold Fabric: Fold your fabric in half lengthwise, then in half again crosswise (or just in half lengthwise if your fabric is wide enough). This allows you to cut symmetrical pieces quickly.
- Draw the Bottom Edge: On your folded fabric, measure 18 inches (46 cm) across for the bottom width. Mark this.
- Draw the Side Seams: From the ends of the bottom width, draw a slightly angled line inwards as you go up.
- At the top, the width should be 11 inches (28 cm).
- The total height is 20 inches (51 cm).
- Draw the Armholes:
- From the top corner of your 11-inch wide top edge, measure down 4.5 inches (11.5 cm) along the side seam. Mark this point.
- Draw a gentle curve from the 11-inch wide top edge to this 4.5-inch mark. This is your armhole.
- Draw the Necklines:
- For the front piece: From the top-center fold, measure down 2 inches (5 cm) and draw a gentle curve for the front neckline.
- For the back piece: From the top-center fold, measure down 1 inch (2.5 cm) and draw a gentle curve for the back neckline.
- Tip: You can cut one piece with the deeper front neckline, then lay it on top of the second piece (cut with the shallower back neckline) to use as a guide, only cutting the armholes and side seams common to both.
- Cut Your Fabric:
- Cut 1 Dress Front piece (with the deeper neckline).
- Cut 1 Dress Back piece (with the shallower neckline).
- Save Scraps: Keep any larger scraps for bias binding (if you choose that for the armholes) or a small pocket.

IV. Let’s Start Sewing Your Baby Dress!
General Sewing Tips:
- Press as you go! Ironing after each seam helps your dress look neat and professional.
- Use plenty of pins or clips. This prevents fabric from shifting, especially with lighter fabrics.
- Backstitch at the beginning and end of every seam to secure your stitches.
- Use a regular stitch length (around 2.5 mm).
Step 1: Sew the Side Seams
- Place the Dress Front piece and the Dress Back piece right sides together, aligning the side raw edges perfectly.
- Pin along both side seams.
- Using your 1/2-inch (1.27 cm) seam allowance, stitch from the armhole down to the bottom hem on both sides.
- Finish the Seams: To prevent fraying and make the dress durable for washing, finish these raw edges. You can:
- Zigzag stitch: Use a zigzag stitch along the raw edge of each seam allowance.
- Serge: If you have a serger.
- French Seams (Advanced but Very Neat): For a completely enclosed seam, stitch wrong sides together first, trim, then turn right sides together and stitch again.
- Press the side seams open or towards the back (if using French seams).
Step 2: Finish the Armholes
For simple, comfortable armholes, we have a few options:
- Simple Rolled Hem (Easiest):
- Turn the raw edge of each armhole under by 1/4 inch (0.6 cm) towards the wrong side and press.
- Turn it under again by another 1/4 inch and press firmly.
- Stitch close to the inner folded edge all the way around the armhole. Backstitch at the start and end.
- Bias Binding (More Polished):
- Cut two strips of fabric on the bias (diagonal to the grainline), about 1.5 inches (3.8 cm) wide and long enough to go around each armhole plus 1 inch.
- Join bias strips if needed. Press in half lengthwise.
- Align the raw edge of the bias strip with the raw edge of the armhole, right sides together. Stitch with a 1/4-inch seam allowance.
- Press the bias strip away from the dress.
- Wrap the bias strip around the raw edge to the inside of the dress. Press.
- Topstitch from the right side of the dress, close to the edge of the binding, catching the folded edge of the binding on the inside.
Step 3: Create the Neckline Casing for Elastic
This provides an easy-to-wear, comfortable opening.
- Press the raw edge of the entire neckline (front and back) under by 1/4 inch (0.6 cm) towards the wrong side. Press firmly.
- Press it under again by 3/4 inch (1.9 cm) towards the wrong side. This creates your casing. Press firmly.
- Stitch around the entire neckline, close to the inner folded edge (about 1/8 inch / 0.3 cm from the fold), leaving a 1-inch (2.5 cm) opening at the back for threading the elastic. Backstitch at the start and end of your stitching.
Step 4: Thread the Elastic Through the Neckline Casing
- Cut a piece of 1/2-inch (1.27 cm) elastic about 18-20 inches (46-51 cm) long. (The exact length will depend on the child’s head circumference; you’ll adjust this).
- Attach a safety pin to one end of the elastic.
- Insert the safety pin into the 1-inch opening you left in the neckline casing.
- Carefully thread the elastic all the way through the casing until the safety pin emerges from the other side of the opening. Be careful not to let the other end of the elastic disappear into the casing! You can pin the trailing end to the fabric at the opening.
- Fit Test: Gently pull the elastic to gather the neckline. Place the dress over the child’s head (or a doll/mannequin of similar size) to test the fit. It should slip on easily but be snug enough to stay on the shoulders.
- Once you’re happy with the elastic length, overlap the two ends of the elastic by about 1/2 inch (1.27 cm). Stitch them together securely (e.g., using a box stitch or zigzag stitch multiple times).
- Gently pull the fabric to draw the elastic into the casing. Stitch the 1-inch opening in the casing closed by machine (sewing close to the folded edge) or by hand.
Step 5: Hem the Bottom of the Dress
- Turn the raw bottom edge of the dress under by 1/2 inch (1.27 cm) towards the wrong side and press firmly.
- Turn it under again by another 1/2 inch (1.27 cm) and press firmly. This creates a neat double-fold hem.
- Stitch close to the inner folded edge all the way around the bottom of the dress. Backstitch at the start and end.
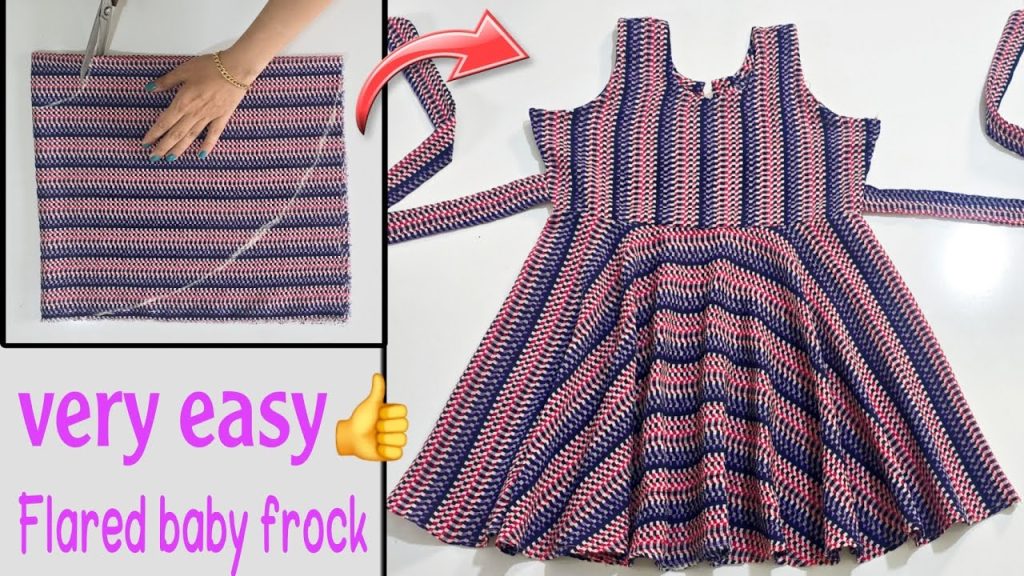
Your adorable, handmade baby dress for a 2-3 year old is now complete! This simple A-line design is perfect for comfortable play and easy changes. You can customize it further by adding:
- A small patch pocket on the front.
- Simple embroidery or fabric appliques.
- Ribbon bows sewn to the shoulders.
- Contrasting bias binding on the armholes and neckline (if you skipped the elastic).
Enjoy seeing your little one wear your lovely creation!