

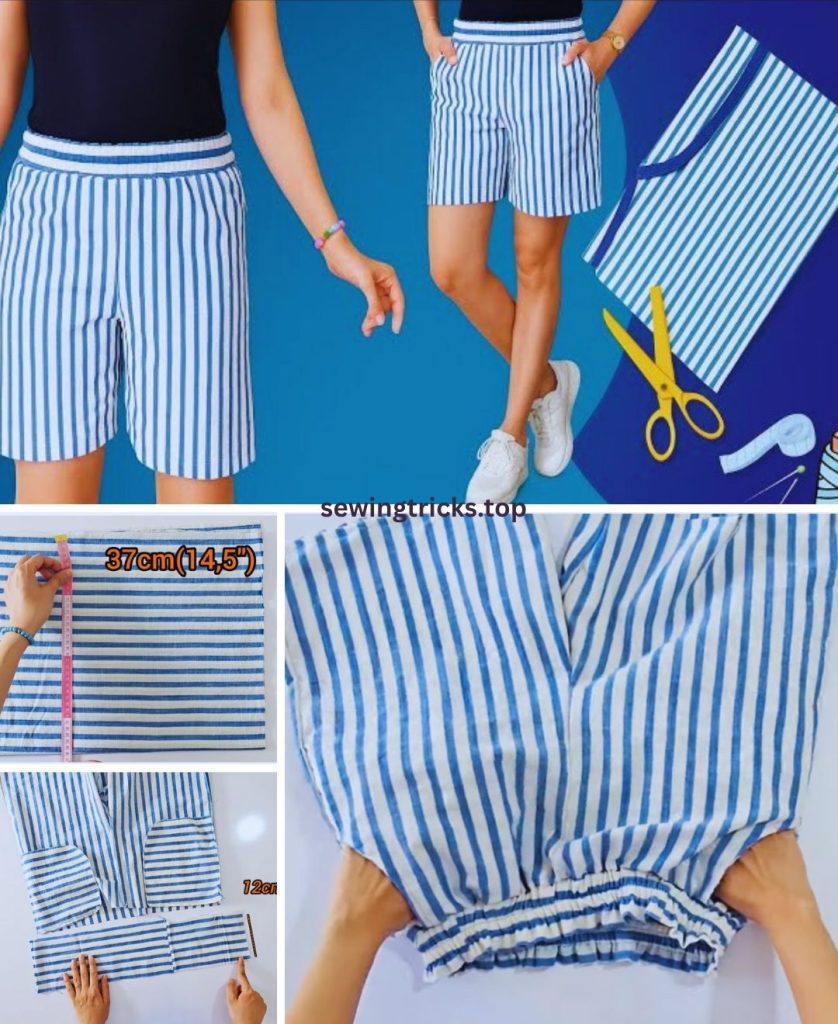
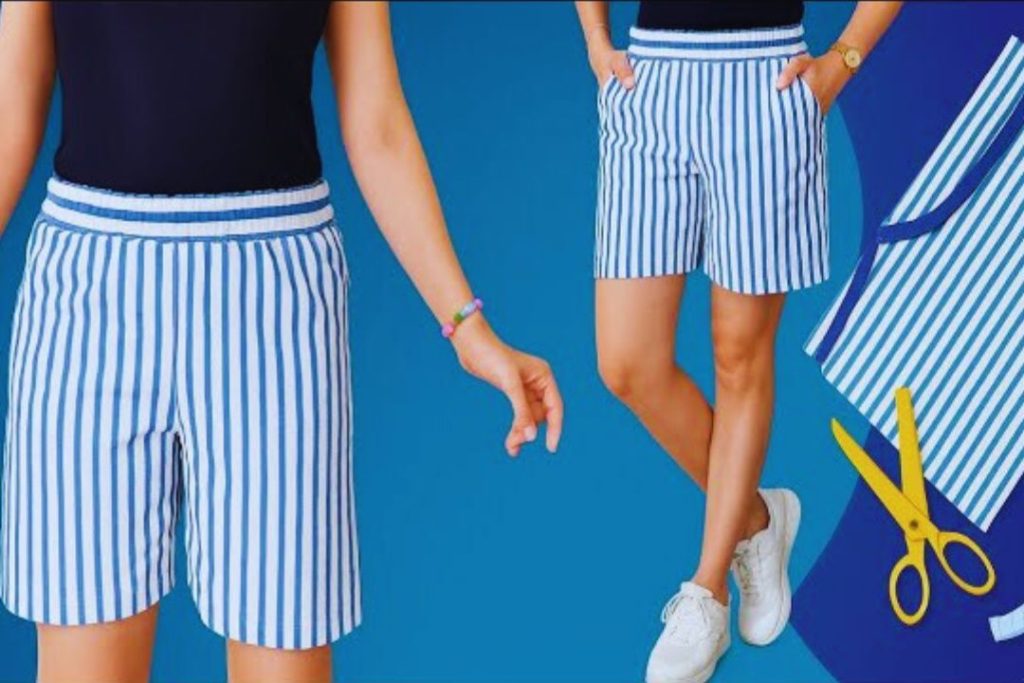
Fashionable shorts with pockets are a fantastic sewing project for girls, combining comfort, style, and practicality! Pockets are always a win, and by choosing the right fabric and fit, you can make shorts that she’ll absolutely love to wear.
This guide will focus on creating a pair of comfortable, flat-front shorts with an elasticized back waistband and simple patch pockets. This design is forgiving for fitting and relatively easy for a confident beginner to intermediate sewer.
How to Sew Fashionable Shorts with Pockets for Girls

I. Planning Your Stylish Shorts
Before you cut, a little planning ensures your shorts fit well and look great.
- Size: The most crucial step! Do not guess. Measure the girl you are sewing for (waist and hip circumference, and desired inseam/outseam length). Alternatively, find a pair of her well-fitting, non-stretch shorts and take measurements directly from those.
- Key Measurements Needed:
- Waist Circumference: Measure at the natural waist.
- Hip Circumference: Measure around the fullest part of her bottom.
- Outseam Length: From her natural waist down to where you want the shorts to end (e.g., mid-thigh, knee).
- Inseam Length: From her crotch down to where you want the shorts to end.
- Rise: From the crotch seam up to the natural waist.
- Key Measurements Needed:
- Fabric Choice:
- Best Options: Lightweight cotton twill, broadcloth, denim (lighter weights work best), linen blends, seersucker, or sturdy quilting cottons. These fabrics are durable, comfortable, and hold their shape well.
- Avoid: Very stretchy knits (unless you’re experienced with them and adjust your pattern), or slippery fabrics like rayon/silk for this design.
- Amount: 1 to 1.5 yards (0.9 to 1.4 meters), depending on size and desired length. It’s always better to have a little extra!
- Pocket Style: We’ll do simple patch pockets on the back or front, as they’re easy to sew and add style.
- Waistband: An elasticized back waistband with a flat front is comfortable, easy to fit, and looks polished.
II. Gather Your Materials
Having everything ready ensures a smooth sewing experience.
- Fabric: 1 to 1.5 yards of your chosen fabric. Pre-wash and iron it!
- Matching Thread: All-purpose polyester thread.
- Elastic: 1-inch (2.5 cm) wide non-roll elastic. You’ll need about 10-15 inches (25-38 cm), depending on the girl’s waist measurement.
- Optional: Lightweight fusible interfacing for the front waistband (about 4 inches x 18-20 inches, depending on size). This adds stability.
- Basic Sewing Supplies:
- Sewing Machine
- Sharp Fabric Scissors or Rotary Cutter and Mat
- Long Quilting Ruler or Measuring Tape
- Fabric Chalk or Mark-B-Gone Pen
- Plenty of Pins or Fabric Clips
- Iron and Ironing Board
- Seam Ripper (your best friend!)
- Safety Pin or Bodkin (for threading elastic)
III. Create Your Pattern Pieces & Cut Your Fabric
Since this is a simple design, you can draft these pieces directly on your fabric or on paper. We’ll use a 1/2-inch (1.27 cm) seam allowance throughout unless specified.
Measurements for Pattern Pieces (Adjust based on your measurements!):
- Shorts Front Piece (Cut 2, mirrored):
- Width at Hip: (Hip Circumference / 4) + 1 inch (for ease) + 1/2 inch (seam allowance)
- Width at Waist: (Waist Circumference / 4) + 1/2 inch (seam allowance)
- Rise: Measure from her crotch up to her natural waist, then add 1.5 inches for the waistband casing.
- Outseam Length: Desired length + 1.5 inches (for bottom hem).
- Shorts Back Piece (Cut 2, mirrored):
- Width at Hip: (Hip Circumference / 4) + 1 inch (for ease) + 1/2 inch (seam allowance)
- Width at Waist: (Waist Circumference / 4) + 2 inches (for elastic gathering) + 1/2 inch (seam allowance)
- Rise: Front rise + 1.5 to 2 inches (back rise is generally higher for comfort and coverage).
- Outseam Length: Desired length + 1.5 inches (for bottom hem).
- Waistband Piece (Cut 1):
- Length: (Waist Circumference / 2) + 1 inch (for seam allowances). This is the flat front portion.
- Height: 3 inches (for a 1-inch elastic casing with 1/2-inch seam allowances).
- Pocket Pieces (Cut 2):
- Rectangle: Roughly 5-6 inches wide x 6-7 inches tall (adjust for size of shorts).
Drafting Instructions (on paper or directly on fabric):
- Shorts Front Piece:
- Fold your fabric in half lengthwise.
- Along the fold (which will be the center front), measure up the front rise amount.
- At the top, measure out your waist width.
- At the bottom of the rise, draw a gentle curve outwards for the crotch curve (the “J” shape). This curve should be shallower than the back crotch curve.
- Measure out your hip width at the widest point.
- Draw the side seam connecting the hip width to the waist width.
- Measure down your outseam length from the top edge. Draw the bottom hem.
- Cut out two mirrored pieces.
- Shorts Back Piece:
- Place a front piece on top of your folded fabric, lining up the side seam and bottom hem.
- The back piece will be wider at the waist (for elastic) and have a longer, deeper crotch curve for good fit.
- At the top, measure out your back waist width.
- At the bottom of the rise, draw a deeper, curvier crotch curve.
- Cut out two mirrored pieces.
- Waistband Piece:
- Cut one rectangle the calculated length and height. If using fusible interfacing, cut a piece the same size.
- Pocket Pieces:
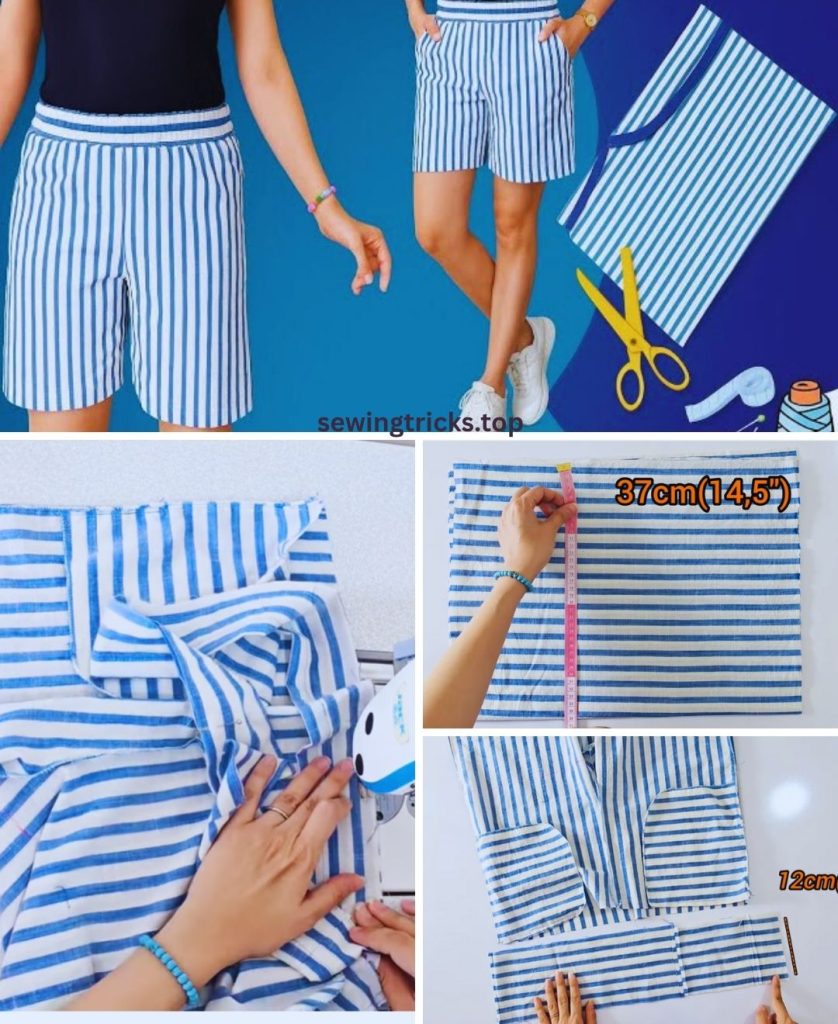
- Cut two rectangles. For the top edge of the pocket, fold down 1/4 inch, press, then 1/2 inch, press, and stitch. This is your pocket hem.
IV. Let’s Start Sewing Your Fashionable Shorts!
We’ll use a 1/2-inch (1.27 cm) seam allowance unless otherwise stated. Always press seams after stitching!
Step 1: Prepare Pockets
- Take your two pocket pieces.
- On each pocket:
- Fold the top raw edge down by 1/4 inch (0.6 cm) towards the wrong side and press.
- Fold it down again by 1/2 inch (1.27 cm) and press firmly. Stitch this hem in place (this will be the top opening of your pocket).
- Fold the remaining three raw edges (sides and bottom) towards the wrong side by 1/2 inch (1.27 cm) and press firmly.
- Position and Attach Pockets:
- Lay out your Shorts Back pieces (right side up).
- Position one prepared pocket on each back leg. A good placement is centered horizontally between the side seam and the back crotch curve, and about 1.5-2 inches down from where the waistband will be. Pin securely.
- Topstitch the pockets in place along their two sides and bottom edge. Stitch close to the folded edge (about 1/8 inch / 0.3 cm). Reinforce the top corners of the pockets with a small triangle stitch or a few back-and-forth stitches, as this is a high-stress area.
Step 2: Sew the Inseams
- Take one Shorts Front piece and one Shorts Back piece. Place them right sides together, aligning the inner leg seam (inseam).
- Pin along the inseam from the crotch curve down to the hem.
- Stitch the inseam.
- Finish the Seam: Finish the raw edges of this seam (zigzag, serge, or French seam).
- Press the seam open or towards the back.
- Repeat for the other front and back shorts pieces. You now have two separate pant legs.
Step 3: Sew the Crotch Seam (Front and Back Rise)
- Take your two separate pant legs. Turn one leg right side out and the other leg wrong side out.
- Carefully slip the right-side-out leg inside the wrong-side-out leg, so their right sides are together.
- Align the front crotch curves and the back crotch curves perfectly. Pin securely all along this “U” shaped crotch seam.
- Stitch the entire crotch seam in one continuous line.
- Reinforce: Stitch this seam a second time for added durability, as it’s a high-stress area.
- Finish the Seam: Finish the raw edges of this seam.
- Press the seam open or towards one side (usually the left side for less bulk).
- Turn the shorts right side out.
Step 4: Prepare and Attach the Waistband
This creates the flat front and elasticized back.
- Prepare Waistband Piece:
- If using interfacing, fuse it to one half of the waistband piece (this will be the outer waistband) according to manufacturer instructions.
- Fold the entire waistband piece in half lengthwise, wrong sides together, and press firmly.
- Attach Waistband to Shorts:
- Find the center front of your shorts. Mark it with a pin.
- Align the center of the waistband piece with the center front of the shorts, right sides together (raw edge of waistband aligned with raw edge of shorts waist). Pin this center point.
- Pin the waistband to the shorts waist seam, working from the center front towards the side seams. The waistband will only cover the flat front portion of the shorts.
- Stitch the waistband to the shorts waist. Stop stitching exactly at the side seams on both sides.
- Press the waistband seam allowance up towards the waistband.
Step 5: Create the Elastic Casing and Side Seams of the Waistband
- Sew Side Seams of Waistband:
- Fold the shorts right sides together, aligning the side seams.
- Continue the stitch of the shorts’ side seam up through the waistband piece, right sides together. Stitch the short ends of the waistband together. This encloses the raw side edges of the waistband. Repeat for both sides.
- Trim any bulk at the side seams.
- Create Back Elastic Casing:
- From the inside of the shorts, fold the raw top edge of the waistband down by 1/2 inch (1.27 cm) towards the wrong side and press.
- Fold it down again, aligning the folded edge with the previous waistband stitch line (where the waistband meets the shorts body). Pin securely.
- Starting at one side seam, stitch all the way around the top edge of the waist, stitching close to the previous seam line. Stop stitching about 1.5-2 inches (3.8-5 cm) before you reach your starting point (at the back of the shorts). This opening will be for threading the elastic.
Step 6: Thread the Elastic
- Measure the girl’s waist circumference and subtract 2-3 inches (5-7.6 cm) for the elastic length. (E.g., if waist is 20 inches, cut 17-18 inches of elastic).
- Attach a safety pin to one end of your 1-inch elastic.
- Insert the safety pin into the opening you left in the waistband casing.
- Carefully thread the elastic all the way through the casing until the safety pin emerges from the other side. Be careful not to let the other end of the elastic disappear into the casing! You can pin the trailing end to the fabric at the opening.
- Test Fit: Hold both ends of the elastic together and have the girl try on the shorts (or test on a similar-sized pair). Adjust the elastic length until it feels comfortable but snug.
- Overlap the two ends of the elastic by 1/2 inch (1.27 cm). Stitch them together securely (e.g., using a box stitch or zigzag stitch multiple times).
- Gently pull the fabric to draw the elastic fully into the casing. Stitch the opening in the casing closed.
Step 7: Hem the Bottom of the Shorts
- Turn the raw bottom edge of each short leg under by 1/2 inch (1.27 cm) towards the wrong side and press firmly.
- Turn it under again by another 1 inch (2.5 cm) and press firmly. This creates a neat double-fold hem.
- Stitch close to the inner folded edge all the way around each short leg. Backstitch at the start and end.
Your fashionable shorts with pockets are complete! These will be a versatile addition to any girl’s wardrobe.
V. Styling and Customizing Your Shorts
- Topstitching: For an authentic denim look, use a contrasting color thread (like gold or orange) and a longer stitch length (3.0-3.5mm) for all visible seams, especially around the pockets and waistband.
- Embellishments: Add cute patches, embroidery, or fabric paint designs to the pockets or shorts legs.
- Cuffs: Instead of a simple hem, create a wider cuff for a different look. Just add more length to your original pattern.
- Different Pockets: Explore other pocket styles like rounded patch pockets, side seam pockets (more complex to integrate), or faux welt pockets.
- Belt Loops: Add simple belt loops to the waistband if she likes to wear belts.
- Drawstring: For added adjustability or just a decorative touch, add a functional (or faux) drawstring to the front waistband, tying it in a bow.
Enjoy seeing her wear her comfy, stylish, and handmade shorts!