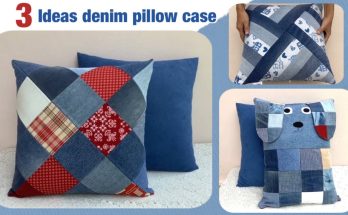
Creating a DIY patchwork denim and printed fabric pillow cover is a wonderful way to use up those leftover denim scraps and other fabric bits, transforming them into a cozy, unique home accent! It’s a fantastic project for showcasing different textures and patterns, and the result is a one-of-a-kind piece that adds character to any room.
This detailed guide will walk you through designing, piecing, and sewing a standard square pillow cover, making it easy for you to personalize your living space.

How to Sew a DIY Patchwork Denim and Printed Fabric Pillow Cover
I. Planning Your Patchwork Pillow Cover
Careful planning is crucial when working with fabric scraps. It helps you maximize your materials and ensures a harmonious final design.
- Determine Pillow Size: Decide on the size of the pillow insert you want to cover.
- Common sizes are 16″x16″ (40×40 cm), 18″x18″ (45×45 cm), or 20″x20″ (50×50 cm).
- For this tutorial, let’s assume an 18″x18″ (45×45 cm) pillow insert.
- Fabric Assessment:
- Lay out all your denim scraps from old jeans. Look for varying washes (light, medium, dark) for visual interest.
- Gather your printed fabric scraps. These could be quilting cottons, old shirts, or other sturdy fabrics. Aim for a mix of patterns and colors that complement each other and your denim.
- Prioritize non-stretch or low-stretch fabrics for both denim and prints for easier sewing and a stable pillow cover.
- Patchwork Design: This is where your creativity shines!
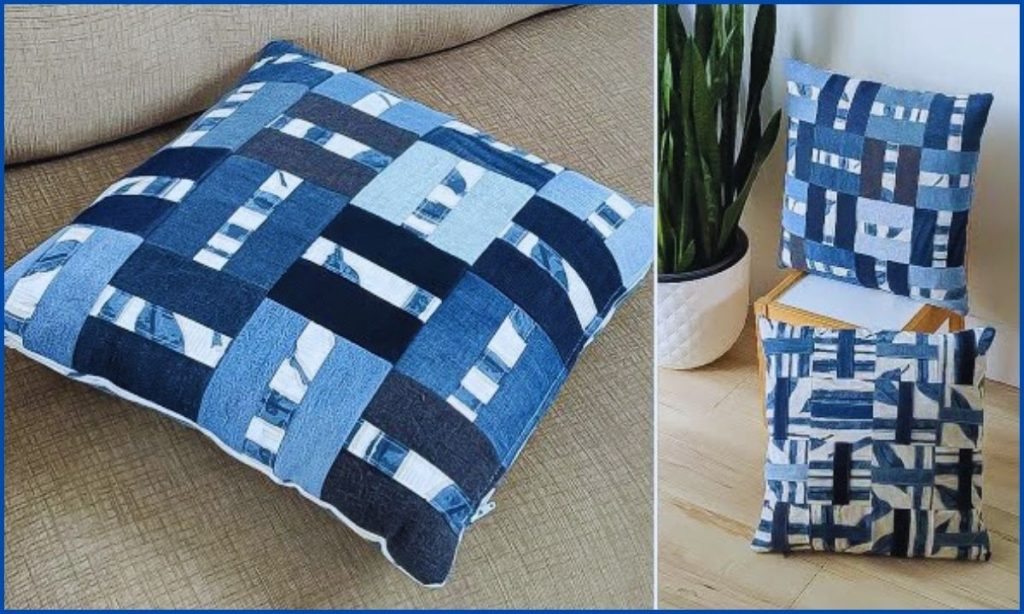
- Simple Squares/Rectangles: The easiest for beginners. Decide on a uniform size (e.g., 3×3 inch, 4×4 inch finished squares) or random rectangles.
- Stripes/Bands: Piece together strips of varying widths, either horizontally or vertically.
- Crazy Patchwork: More free-form, stitching irregular shapes together. This can be fun for using very small scraps.
- Backing Fabric: For a simple pillow cover, an envelope-style back is easiest (no zipper needed!). This requires two overlapping panels. You can use solid denim, a large piece of printed fabric, or even more patchwork for the back.
II. Gather Your Materials
Having all your supplies ready before you start sewing will make your project much smoother.
- Old Jeans’ Leftover Fabric: A collection of denim scraps from various washes.
- Printed Fabric Scraps: A collection of quilting cottons or other sturdy cotton fabric scraps.
- Pillow Insert: The actual pillow you want to cover (e.g., 18″x18″).
- Heavyweight Fusible Interfacing (Optional but Recommended for Stability): If your denim or printed fabrics are very light, a lightweight fusible interfacing (e.g., Pellon SF101 Shape-Flex) can add stability to your patchwork pieces before assembling. If your denim is already quite sturdy, you might skip this or use it only for lighter printed pieces.
- Matching Thread: All-purpose polyester thread. Consider a slightly thicker topstitching thread in a contrasting color (like gold, orange, or beige) for decorative seams on denim, if desired.
- Basic Sewing Supplies:
- Sewing Machine: A walking foot is highly recommended for evenly feeding patchwork and denim layers.
- Heavy-Duty Needles: Denim needles (size 90/14 or 100/16) are essential for piercing thick denim. Have spares on hand.
- Sharp Fabric Scissors or Rotary Cutter and Mat.
- Long Quilting Ruler or Measuring Tape.
- Fabric Chalk or Mark-B-Gone Pen.
- Plenty of Wonder Clips (superior to pins for holding thick, bulky patchwork).
- Iron and Ironing Board (absolutely crucial for pressing patchwork seams flat!).
- Seam Ripper (your best friend for correcting mistakes!).
III. Prepare & Cut Your Fabric Pieces
Accuracy in cutting and pressing is paramount for neat patchwork. We’ll use a consistent 1/2-inch (1.27 cm) seam allowance throughout this tutorial, unless otherwise specified for patchwork piecing.
- Finished Pillow Cover Size: 18″x18″ (45×45 cm).
A. Cut Your Patchwork Pieces (for the Front Panel):
- Determine Patch Size: Decide on the size of your individual patches. A common finished size for an 18″ pillow is 3-inch or 4-inch squares.
- If you want 3-inch (7.6 cm) finished squares, cut your raw patches 3.5 inches x 3.5 inches (8.9 cm x 8.9 cm) (accounting for 1/4-inch seam allowance on each side for patchwork).
- If you want 4-inch (10.2 cm) finished squares, cut your raw patches 4.5 inches x 4.5 inches (11.4 cm x 11.4 cm).
- Calculate Number of Patches:
- For an 18″ pillow with 3″ finished squares: 18 / 3 = 6 squares per row/column. You’ll need 6 rows x 6 columns = 36 patches total.
- For an 18″ pillow with 4″ finished squares: 18 / 4 = 4.5 squares. This means you’ll need to adjust or use a different patch size, or piece to get to 18″. Let’s stick with a simpler calculation for now.
- Alternative for easier patchwork: Cut various sized rectangles and squares from your denim and printed fabric scraps. The goal is to create one large panel that is at least 18.5 inches x 18.5 inches (47×47 cm) after piecing and pressing.
- Cut Your Patches: Cut many patches from your denim and printed fabric scraps in your chosen sizes. Mix and match colors and textures!
B. Cut Your Backing Fabric Pieces (Envelope Style):
For an 18″x18″ pillow, the back will be made of two overlapping rectangles.
- Backing Panel 1: Cut 1 rectangle, 18.5 inches wide x 12 inches high (47×30.5 cm).
- Backing Panel 2: Cut 1 rectangle, 18.5 inches wide x 10 inches high (47×25.4 cm).
IV. Let’s Start Sewing Your Patchwork Pillow Cover!
General Sewing Tips for Patchwork & Denim:
- Pressing is CRUCIAL! After every seam, press it flat. For patchwork, you can press seams open to reduce bulk, or press them to one side (alternating directions for adjacent rows) to help seams nest.
- Backstitch at the beginning and end of every seam.
- Use your walking foot. It prevents fabric shifting and stretching when sewing multiple layers or fabrics with different weights.
- Clips, clips, clips! They are better than pins for holding thick patchwork and denim.
- Go slow. Precision is more important than speed for patchwork.
- Consistent Seam Allowance: Use a 1/4-inch (0.6 cm) seam allowance when piecing individual patchwork blocks together. Use a 1/2-inch (1.27 cm) seam allowance for assembling the pillow cover (attaching front to back).
Step 1: Piece Together the Patchwork Front Panel
This is the heart of your pillow cover!
- Arrange Your Patches: Lay out all your cut denim and printed fabric patches on a flat surface in your desired 18.5″x18.5″ design. Take a photo of your layout for reference.
- Sew Patches into Rows/Columns:
- Working with two patches at a time, place them right sides together, aligning one edge.
- Stitch them together using a 1/4-inch (0.6 cm) seam allowance.
- Press the seam open (or to one side) before adding the next patch.
- Continue sewing patches together to form your horizontal rows or vertical columns.
- Join Rows/Columns:
- Once you have all your rows/columns sewn, place two adjacent rows/columns right sides together, carefully aligning the seams. Using clips or pins, ensure the seams “nest” or line up perfectly to create a clean intersection.
- Stitch along the length with a 1/4-inch (0.6 cm) seam allowance.
- Press the seams open after joining.
- Final Press & Trim: Once all your patchwork pieces are joined to form one large panel, give the entire panel a thorough final press from the back. Then, using your ruler and rotary cutter (or sharp scissors), trim the panel to precisely 18.5 inches x 18.5 inches (47×47 cm). This is your Patchwork Front Panel.
Step 2: Prepare the Backing Panels (Envelope Style)
This creates the overlapping opening for inserting your pillow.
- Take your two Backing Panels.
- For the first backing panel (18.5″ x 12″): On one of the 18.5-inch edges, fold it under by 1/2 inch (1.27 cm) towards the wrong side and press firmly. Fold it under again by another 1/2 inch and press. Stitch this hem in place, close to the inner fold. This will be the bottom overlap.
- For the second backing panel (18.5″ x 10″): On one of the 18.5-inch edges, fold it under by 1/2 inch (1.27 cm) towards the wrong side and press firmly. Fold it under again by another 1/2 inch and press. Stitch this hem in place, close to the inner fold. This will be the top overlap.

Step 3: Assemble the Pillow Cover
Now, we bring all the pieces together! Use a 1/2-inch (1.27 cm) seam allowance for this step.
- Lay your Patchwork Front Panel right side up on your work surface.
- Place the first Backing Panel (the 18.5″ x 12″ piece with a hemmed edge) on top of the patchwork panel, right side down, aligning the raw (un-hemmed) edge of the backing panel with the top raw edge of the patchwork panel. The hemmed edge will be towards the middle.
- Place the second Backing Panel (the 18.5″ x 10″ piece with a hemmed edge) on top of the patchwork panel, right side down, aligning the raw (un-hemmed) edge of this backing panel with the bottom raw edge of the patchwork panel. The hemmed edge will be towards the middle, overlapping the first backing panel.
- Check that your backing panels overlap by a few inches in the center to create a good opening.
- Clip or pin all around the entire outer perimeter of the stacked panels. Ensure all layers are flat and aligned.
- Stitch all the way around the entire outer edge of the square (all four sides) using a 1/2-inch (1.27 cm) seam allowance. Go slowly and carefully, especially over the overlapping sections and thick denim seams. Backstitch at the beginning and end.
- Clip Corners: Before turning, trim the seam allowance down to about 1/4 inch (0.6 cm) at each corner, cutting diagonally close to the stitching line (being careful not to cut the stitches). This helps create sharp corners.
Step 4: Turn Right Side Out & Finish
- Reach into the envelope opening at the back of the pillow cover.
- Carefully pull the entire pillow cover right side out.
- Gently push out all four corners with a point turner, chopstick, or your fingers to make them crisp.
- Final Press: Give the entire pillow cover a final, good press from the right side, smoothing out all the seams and edges.
- Insert Pillow: Slip your pillow insert into the envelope opening at the back. Adjust the insert so it fills the cover evenly.
Your unique, upcycled Patchwork Denim and Printed Fabric Pillow Cover is now complete! You’ve transformed old jeans and fabric scraps into a beautiful, personalized accent for your home. Enjoy displaying your sustainable and creative masterpiece!
What kind of patterns did you use in your printed fabric scraps?