
Turning an old shirt into a handbag is a fantastic way to recycle and create a unique, personalized accessory! It’s an eco-friendly project that lets you transform something worn or out-of-fashion into a functional and stylish item. The type of shirt you choose will greatly influence the final look and feel of your bag – a sturdy denim shirt will yield a different result than a soft flannel or a flowing silk blouse.
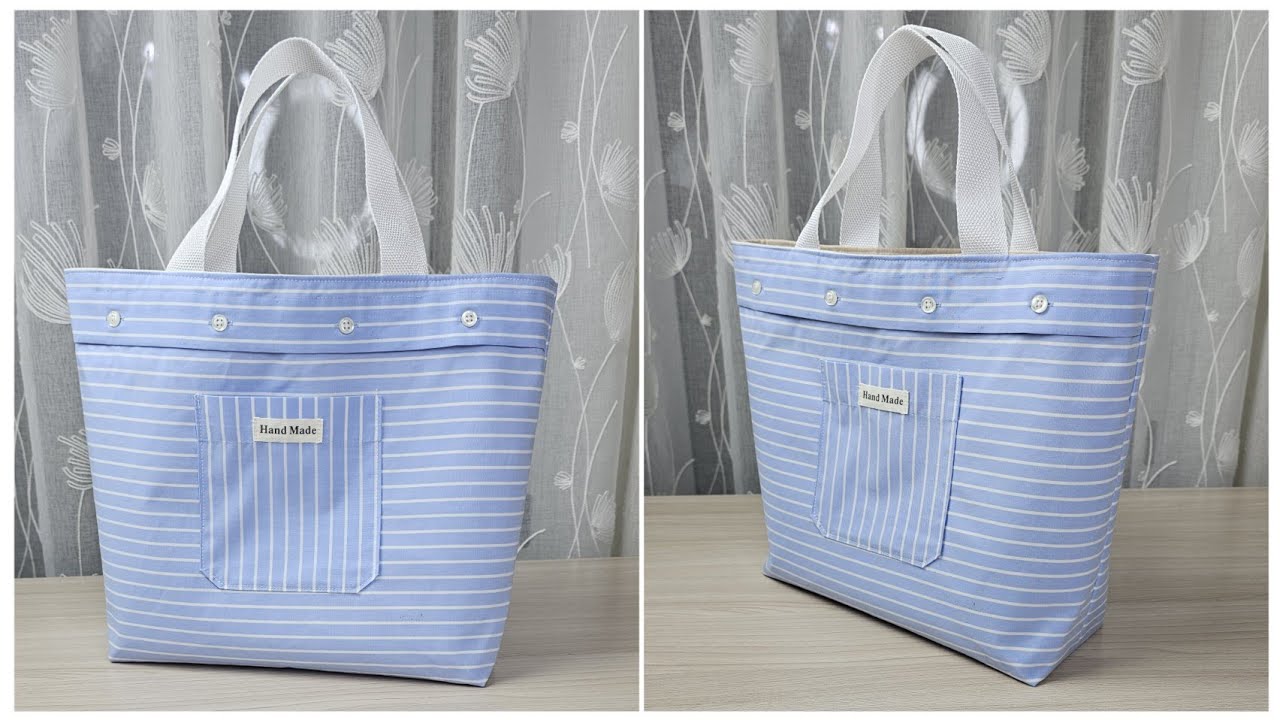
This detailed guide will show you how to sew a simple yet charming tote-style handbag from an old shirt, complete with a lining for a neat finish and fabric handles. We’ll aim for a finished size of approximately 12 inches wide x 13 inches tall (30.5 cm x 33 cm), perfect for light essentials or as a market bag.
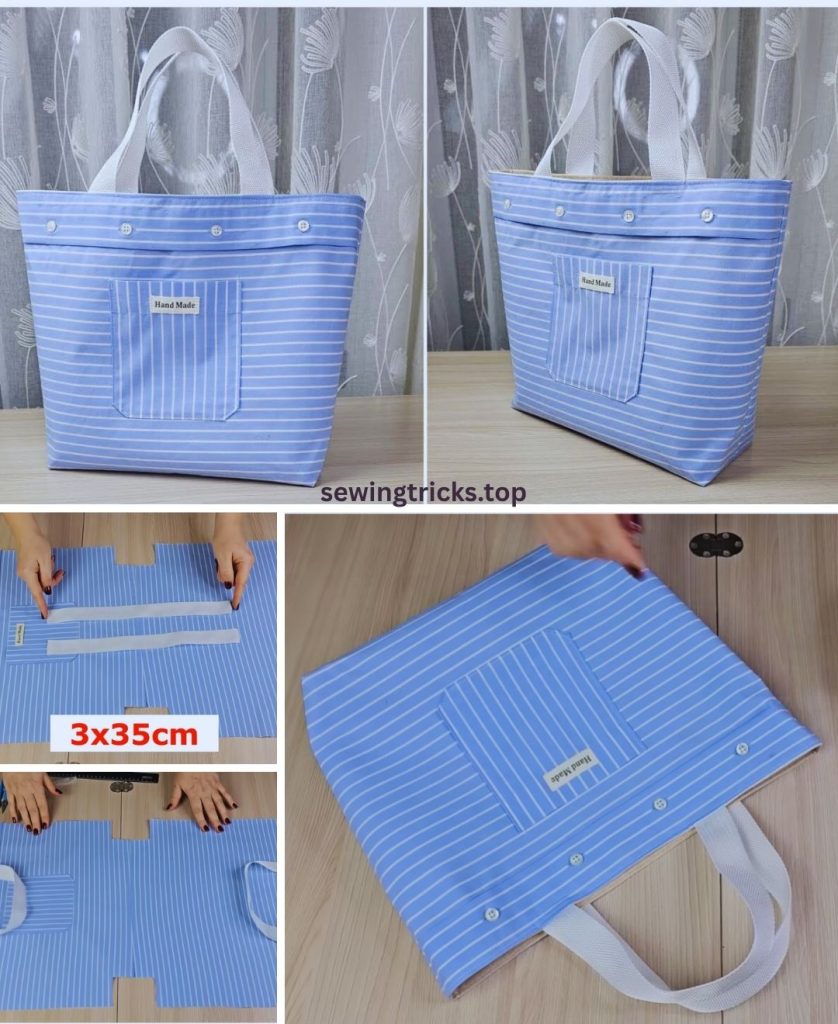
How to Sew a Handbag from an Old Shirt – Recycle
I. Planning Your Upcycled Shirt Handbag
A little planning ensures your project goes smoothly and you get the best use out of your old shirt.
- Choose Your Shirt Wisely:
- Size: You’ll need a shirt large enough to get two main body panels (around 13″x14″ each) and two handle pieces. An adult men’s shirt (L or XL) or a women’s plus-size shirt usually works best.
- Fabric Type:
- Sturdy Cotton (e.g., denim, canvas, thick flannel, corduroy): Ideal for a more structured, durable bag. This type of shirt will likely hold its shape well.
- Lighter Cotton (e.g., broadcloth, poplin, chambray): Will create a softer, more relaxed bag. You might consider adding lightweight interfacing for more body.
- Avoid overly stretchy or sheer fabrics for this basic tote style, as they can be challenging to work with and may not hold up as well.
- Embrace Features: Think about how you can incorporate existing shirt features like pockets, buttons, button plackets, collars, or cuffs into your design for a unique touch. We’ll cover adding a pocket in this tutorial.
- Lining Fabric: Highly recommended! A lining gives your bag a professional, clean finish, hides all raw seams, and adds durability. Choose a lightweight cotton fabric (like quilting cotton) that complements or contrasts nicely with your shirt fabric.
- Interfacing (Optional, but good for shape): If your shirt fabric is on the lighter side, a light to medium-weight fusible interfacing (e.g., Pellon SF101 Shape-Flex) will add more body and structure to your bag.
II. Gather Your Materials
Having everything ready before you start sewing will make the process much smoother.
- One Old Shirt: Clean and ironed.
- Lining Fabric: 1/2 yard (0.45 meters) of coordinating lightweight cotton.
- Light to Medium-Weight Fusible Interfacing (Optional): 1/2 yard (0.45 meters).
- Matching All-Purpose Polyester Thread: Choose a color that blends with both your shirt and lining.
- Basic Sewing Supplies:
- Sewing Machine: With a standard presser foot. (A walking foot is helpful for thicker shirt fabrics like denim or flannel, but not strictly necessary for this simple design).
- Sharp Fabric Scissors or Rotary Cutter and Mat.
- Measuring Tape or Long Quilting Ruler.
- Fabric Chalk, Frixion Pen, or Mark-B-Gone Pen.
- Plenty of Pins or Fabric Clips.
- Iron and Ironing Board (essential for pressing seams and fusing interfacing).
- Seam Ripper (for deconstructing the shirt and correcting mistakes).
III. Prepare Your Shirt & Cut Fabric Pieces
Careful cutting is key to a well-proportioned bag. We’ll use a consistent 1/2-inch (1.27 cm) seam allowance throughout this tutorial.
- Target Finished Bag Size: 12″ W x 13″ H (30.5 cm x 33 cm).
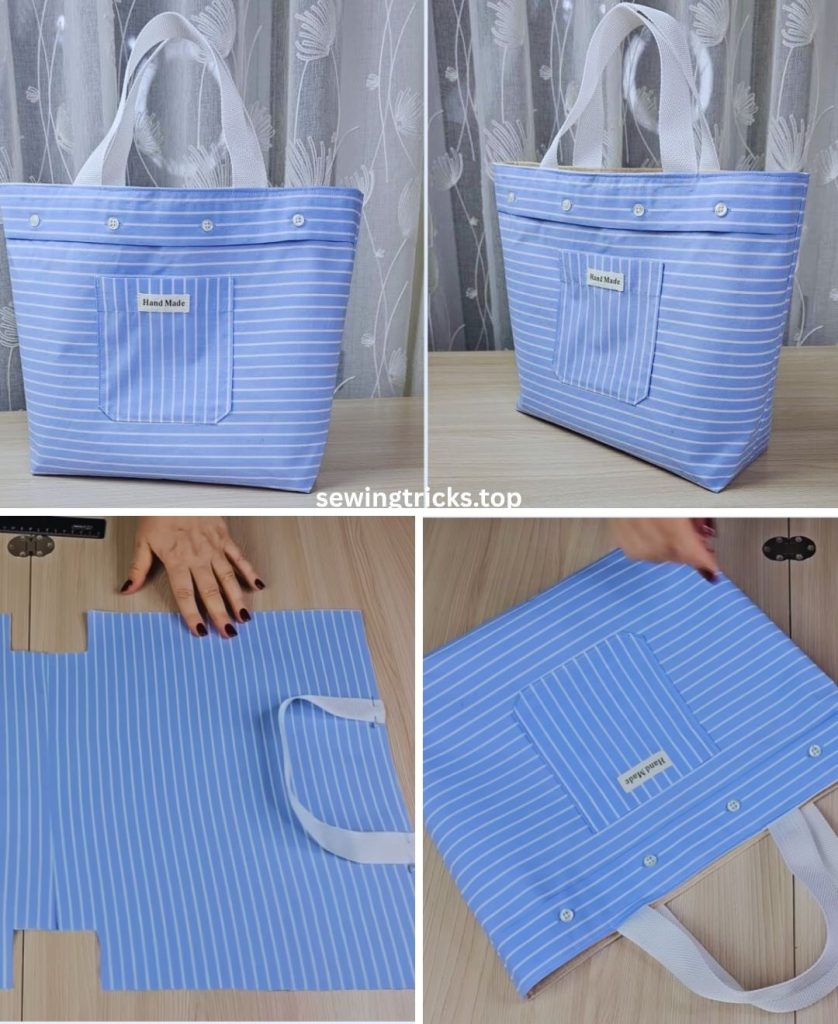
A. Deconstruct Your Shirt (If Necessary):
- Lay the shirt flat and smooth.
- Cut off the sleeves, collar, and bottom hem.
- Carefully cut along one of the side seams (usually the one you want to keep intact the least for aesthetic purposes) and along the shoulder seams to open the shirt into flat panels. Iron them thoroughly.
- Salvage Features (Optional): If the shirt has a chest pocket you want to use, carefully seam rip it off to reattach later. The button placket (where the buttons and buttonholes are) can also be used as a decorative element if you wish.
B. Calculate & Cut Your Panels:
- Main Body Panel Width: Finished Width + (2 * Seam Allowance) = 12″ + 1″ = 13 inches (33 cm)
- Main Body Panel Height: Finished Height + (2 * Seam Allowance) = 13″ + 1″ = 14 inches (35.5 cm)
- Exterior Fabric Pieces (from your shirt):
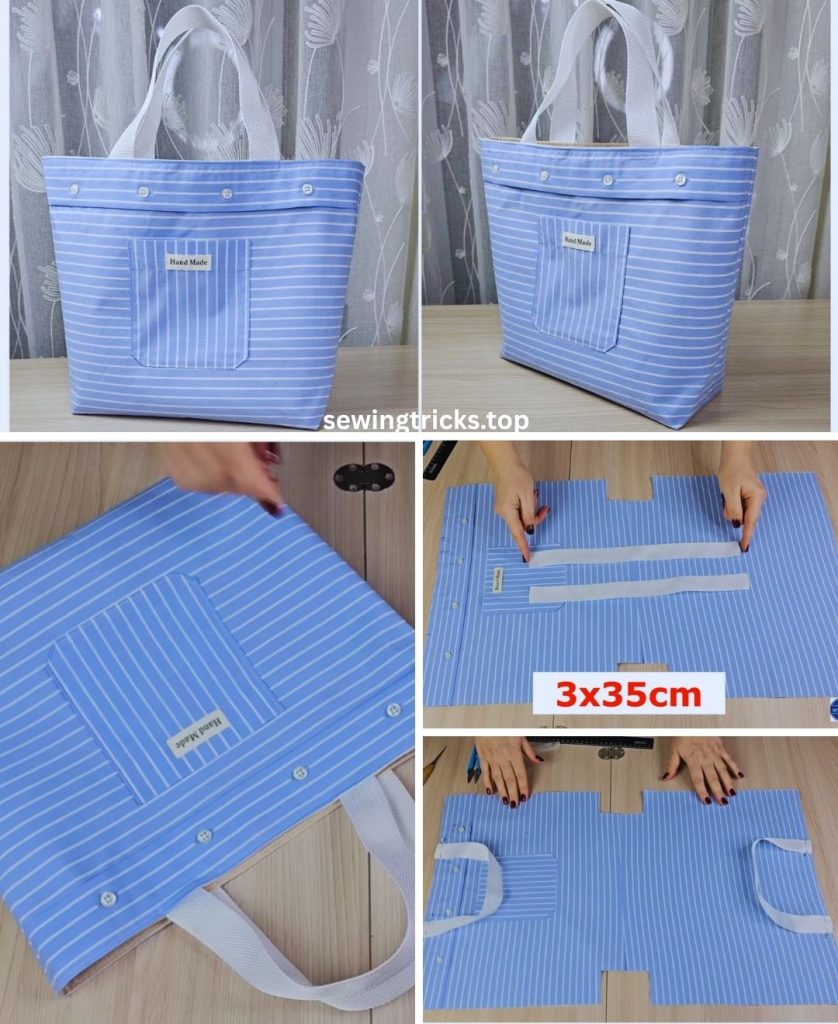
- Main Body (Front & Back): Cut 2 rectangles, each 13 inches wide x 14 inches high. Try to get these from the largest, cleanest parts of the shirt (e.g., the front and back bodice sections).
- Handle Pieces: Cut 2 rectangles, each 3 inches wide x 20 inches long. (You’ll likely need to cut these from sleeve or other larger scrap areas).
- Lining Fabric Pieces:
- Main Body (Front & Back): Cut 2 rectangles, each 13 inches wide x 14 inches high.
- Interior Slip Pocket (Optional): Cut 1 rectangle, 8 inches wide x 9 inches high.
IV. Let’s Start Sewing Your Shirt Handbag!
General Sewing Tips for a Clean Finish:
- Press, Press, Press: Don’t skip this! Pressing seams open after each stitching step makes a huge difference in the final look and feel of your bag. Use a hot iron appropriate for your shirt fabric.
- Backstitch: Always secure your stitches by backstitching at the beginning and end of every seam.
- Go Slow: Take your time, especially when sewing multiple layers or attaching handles. Precision over speed!
Step 1: Fuse Interfacing (Optional, but Recommended)
- If using, take your 2 Exterior Fabric Main Body Panels. Lay each one wrong side up on your ironing board.
- Center one Interfacing piece on each fabric panel.
- Following the manufacturer’s instructions for your specific fusible interfacing, fuse it firmly to the wrong side of the fabric. Apply heat and pressure evenly, then let it cool completely. This will give your bag more body and durability.
Step 2: Prepare Interior Slip Pocket (Optional)
- Take your 8″ x 9″ pocket piece (lining fabric).
- Fold one long 8-inch edge down by 1/2 inch (1.27 cm) towards the wrong side and press. Fold it down again by another 1/2 inch and press. Stitch this double-folded hem in place, sewing close to the inner fold. This will be the neat top edge of your pocket.
- Fold the remaining three raw edges (the two short 9-inch sides and the bottom 8-inch side) in by 1/2 inch (1.27 cm) and press.
- Position this prepared pocket onto the right side of one of your Lining Fabric Main Body Panels. Center it horizontally, and place its top edge about 3-4 inches (7.6-10 cm) down from the top raw edge of the lining panel.
- Topstitch the pocket in place along its two sides and bottom edge, sewing close to the folded edges. Backstitch securely at the beginning and end. For added durability, reinforce the top corners of the pocket opening with a small triangle stitch or extra back-and-forth stitches.
Step 3: Prepare and Attach Fabric Handles
- Take one Handle Piece (3″ x 20″). Fold it in half lengthwise, wrong sides together, and press firmly along the fold.
- Open up the strip. Now, fold each long raw edge in towards the center crease you just made, and press again.
- Fold the entire strip in half again along the original center crease. You should now have a long, flat handle that is about 0.75 inches (1.9 cm) wide, with all raw edges neatly enclosed. Press firmly along the entire length to set the folds.
- Topstitch down both long sides of the prepared handle, sewing about 1/8 inch (0.3 cm) from each edge. This secures all the folds and creates a neat, strong handle.
- Repeat this entire process for the second handle piece.
- Attach to Exterior Bag Panels:
- Lay one Exterior Fabric Main Body Panel (with optional interfacing fused) right side up.
- From each side edge, measure in about 3 inches (7.6 cm) along the top raw edge of the panel. Mark these points with fabric chalk. These marks indicate where your handle ends will be placed.
- Position the raw ends of one prepared handle on the top raw edge of the panel at your marks. Ensure the handle itself is flat and not twisted. The handle should be pointing downwards into the panel. Pin or clip the ends securely in place.
- Stitch the handle ends in place. For strength, sew a small square (about 0.75×0.75 inch) with an “X” inside it (an X-box stitch). Perform this stitching within the 1/2-inch (1.27 cm) seam allowance, close to the raw edge. This reinforcement is crucial as the handles will bear the weight of the bag’s contents.
- Repeat for the second exterior panel with the second handle.
Step 4: Sew the Bag Body (Exterior and Lining)
- Place your two Exterior Fabric Main Body Panels right sides together. The handles should be tucked inside the bag. Pin or clip along both side edges and the entire bottom edge.
- Stitch from one top corner down that side, pivot sharply at the bottom corner, stitch straight across the bottom, pivot again, and stitch up the other side to the top corner. Backstitch at the beginning and end of your seam.
- Press all seams open thoroughly to reduce bulk.
- Now, prepare your Lining Fabric Main Body Panels. Place them right sides together. Pin or clip along both side edges.
- CRUCIAL STEP: For the bottom seam of the lining, you must leave an opening! Stitch down one side seam. Then, for the bottom seam, stitch approximately 3 inches (7.6 cm) from one side, then leave a 4-6 inch (10-15 cm) unstitched gap in the middle of the bottom seam. This opening is absolutely essential for turning the entire bag right side out later. After the gap, stitch for another 3 inches (7.6 cm) to reach the other side seam. Backstitch well at the start and end of your stitching around the gap.
- Stitch up the second side seam of the lining.
- Press all lining seams open.
Step 5: Box the Corners (Exterior and Lining – Optional for a flatter bag)
This step creates a flat, defined bottom for your tote bag, giving it more structure. If you want a simpler, flatter bag, you can skip this step.
- At one of the bottom corners of the exterior fabric bag, carefully bring the side seam and the bottom seam together, aligning them perfectly. This action will naturally form a triangular shape at the corner.
- Measure from the tip of this triangle inward along the seam line a distance equal to half of your desired bag depth (e.g., if you want a 3-inch deep bag, you’ll measure 1.5 inches / 3.8 cm).
- Draw a straight line perpendicular to the seam at this measured point. (This line will be 3 inches long if your desired depth is 3 inches).
- Clip firmly along this drawn line.
- Stitch precisely along the drawn line, backstitching securely at both ends.
- Trim the excess fabric from the corner, leaving about a 1/2-inch (1.27 cm) seam allowance beyond your new stitching line.
- Repeat this exact process for all three remaining corners: the other exterior corner and both lining corners.
- Result: Both your exterior fabric bag and your lining bag now have structured, flat bottoms. Keep the exterior bag right side out and the lining bag wrong side out.
Step 6: Final Assembly (The “Bag-in-a-Bag” Method)
This clever technique encloses all raw edges at the top of your bag, resulting in a very clean and professional finish.
- Carefully insert the exterior fabric bag (which is right side out, with handles pointing down inside) into the lining bag (which is wrong side out).
- The right sides of both bags should now be facing each other.
- Align the side seams of the exterior bag with the side seams of the lining bag.
- Align the top raw edges of the exterior fabric and the lining fabric all around the entire opening of the bag. The handles should be tucked well inside between the layers.
- Clip very securely all the way around this top opening, matching up seams precisely.
- Stitch all the way around the entire top opening of the bag, using a 1/2-inch (1.27 cm) seam allowance. Go slowly and carefully, especially over the thick areas where the handles are attached. Backstitch at the beginning and end of your seam.
- Trim Bulk: Carefully trim the seam allowance at the top down to about 1/4 inch (0.6 cm) to reduce bulk inside the top edge for a smoother finish.
Step 7: Turn Your Bag Right Side Out & Finish
This is the incredibly satisfying moment your handmade bag takes its final, beautiful shape!
- Remember that opening you left in the bottom seam of the lining in Step 4 (or 5 if you skipped boxing)? Reach through it.
- Slowly and carefully pull the entire bag (exterior, lining, handles – everything!) through this opening until it is completely right side out. Take your time, gently pushing out all the corners and seams for a crisp, well-defined shape.
- Close the Lining Opening: Go to your ironing board. Press the raw edges of the opening in the bottom of the lining under by 1/2 inch (1.27 cm) so they meet neatly. Align these pressed edges and pin or clip them together. Stitch this opening closed by machine (sewing very close to the folded edge for a neat finish) or by hand using an invisible ladder stitch for a truly seamless look.
- Now, gently push the lining down into the exterior bag, ensuring it sits smoothly inside and the top edges are even.
- Final Press & Topstitch: Carefully press the entire top edge of the bag, ensuring the lining is fully tucked inside and isn’t peeking out over the top edge of the exterior fabric.
- For a super polished and durable finish, topstitch all around the entire top opening of the tote, sewing about 1/8 inch (0.3 cm) from the edge. This final topstitching marries the lining to the exterior, helps the bag hold its shape, and creates a crisp, professional look. You can also sew a second row of topstitching about 1/2 inch (1.27 cm) from the top edge for added detail and stability.
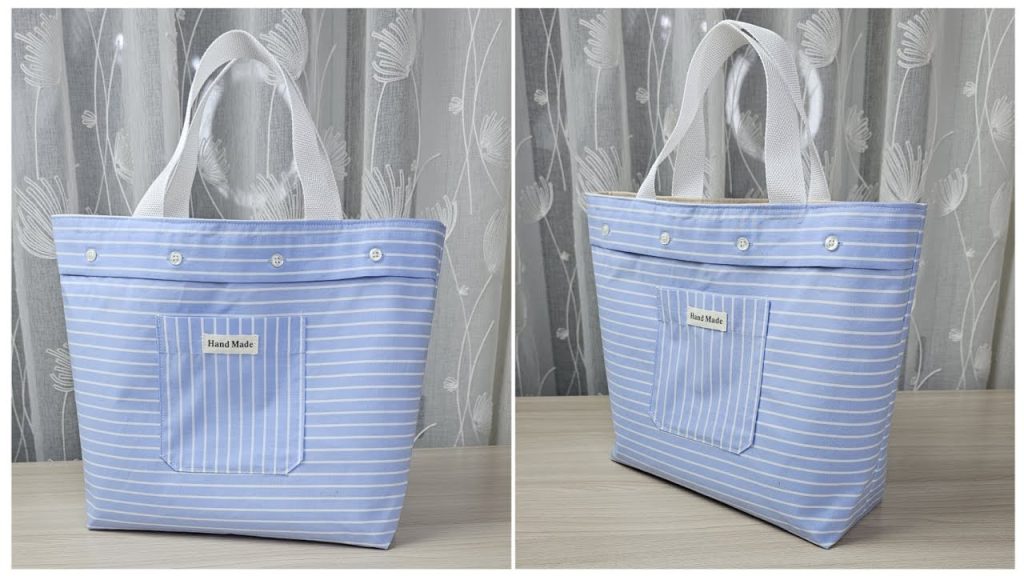
Congratulations! Your unique, handmade Handbag from an Old Shirt is now complete. You’ve successfully recycled an old item into a functional, stylish, and truly personalized accessory. Enjoy using your sustainable creation!
What kind of shirt did you choose for your bag, and did you manage to incorporate any of its original features?


