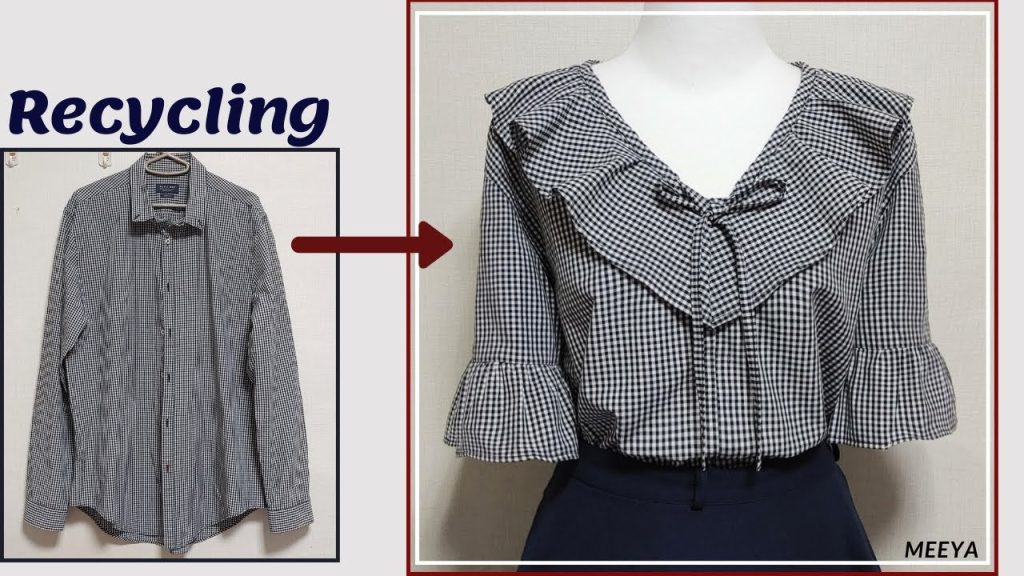
Repurposing old clothes into new ones is a fantastic way to be sustainable, save money, and unleash your creativity! It’s often called “upcycling” or “refashioning.” Instead of simply patching a tear, you’re transforming the garment into something entirely new, often with a different style or function.
The beauty of this is that there’s no single “right” way to do it. The possibilities are truly endless, limited only by your imagination and basic sewing skills. Below, I’ll detail two popular approaches to reforming an old shirt into a new one, focusing on different levels of transformation.
How to Reform Old Your Clothes to New: DIY Shirt Upcycling
Before diving into any project, always wash and iron your old shirts. This ensures they’re clean, easy to work with, and any shrinkage has already occurred.
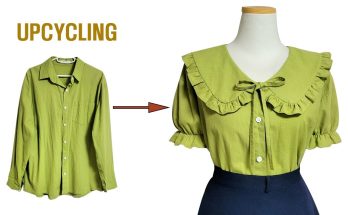
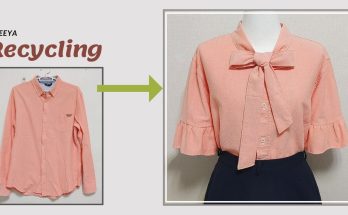
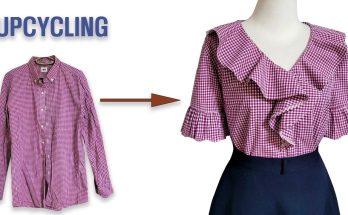
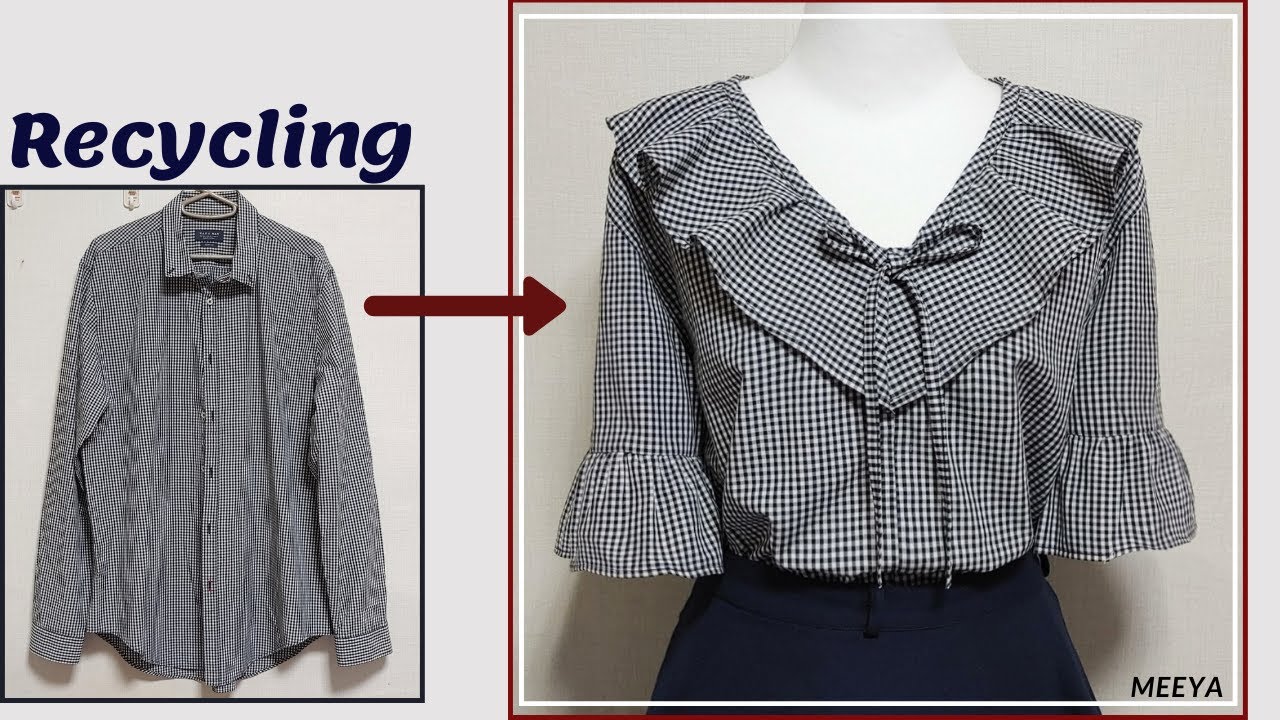
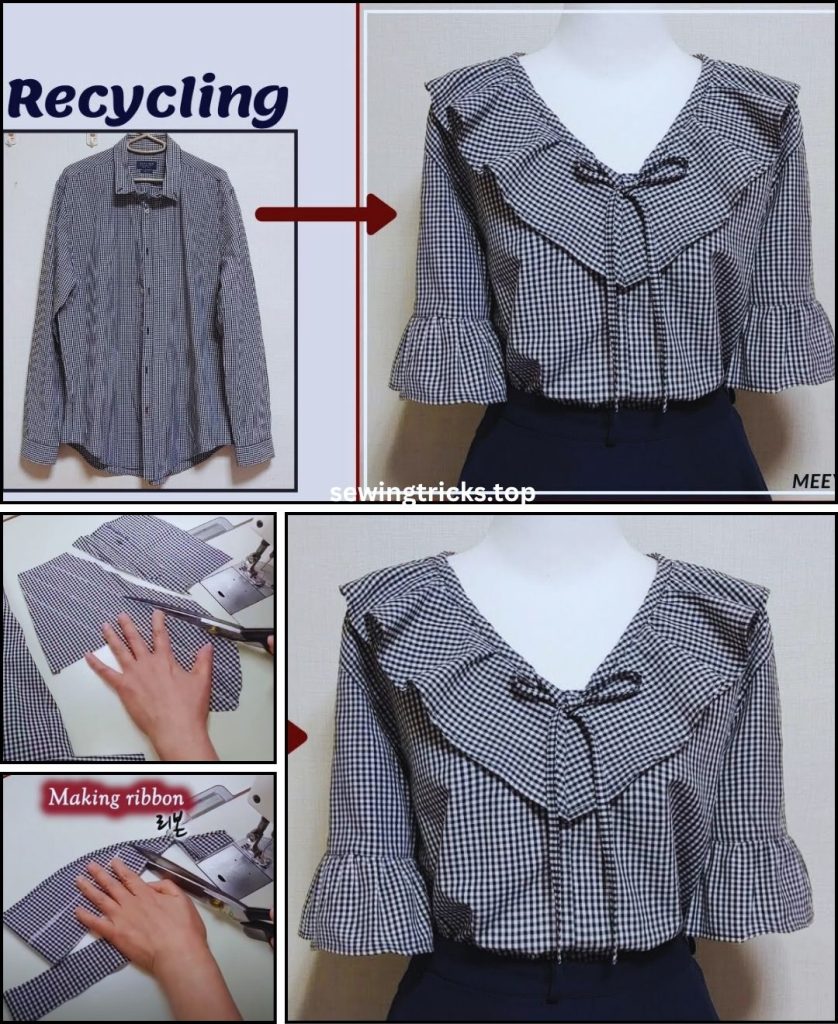
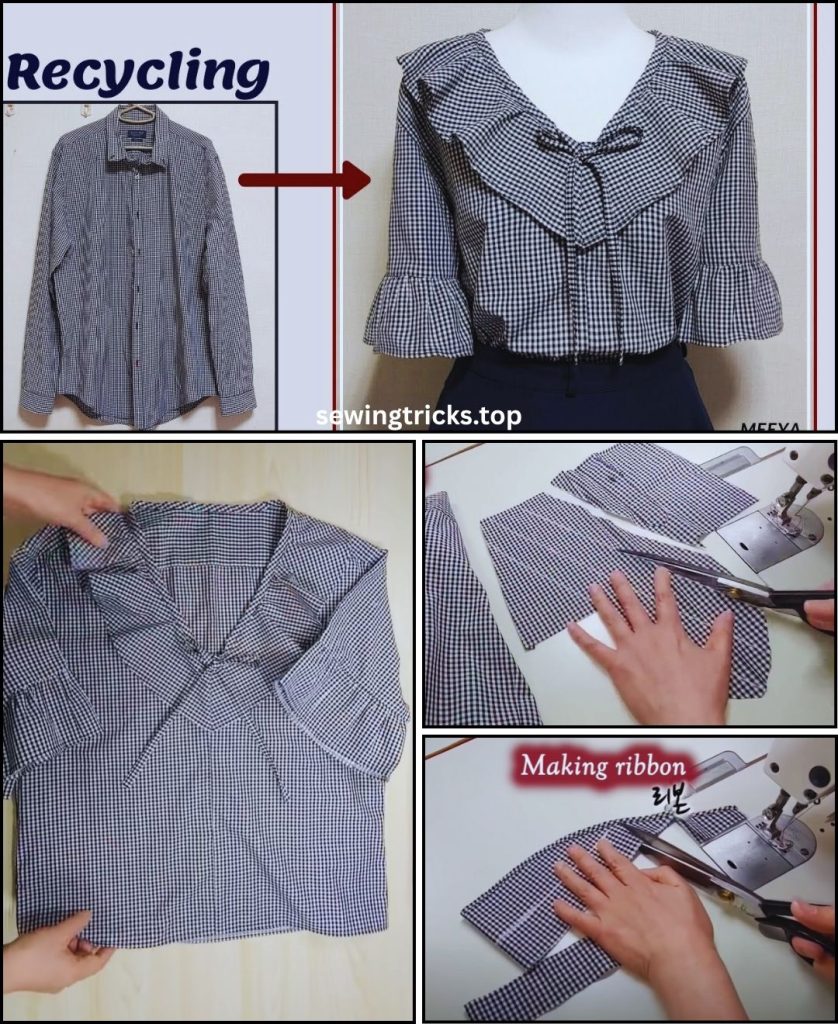
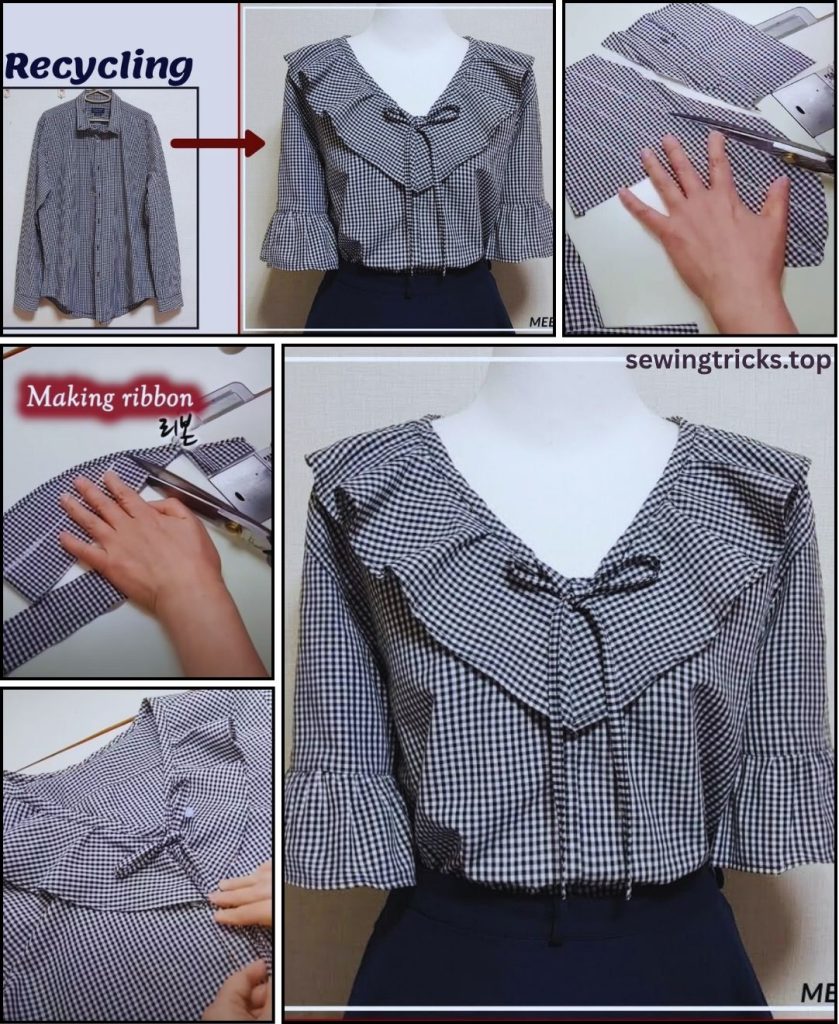
Idea 1: Simple Refashion – Transforming a Button-Down Shirt into a Stylish Top
This idea focuses on altering an existing shirt to give it a completely new silhouette or feel without completely deconstructing it. It’s great for beginner to intermediate sewers. We’ll use a men’s oversized button-down shirt to create a flowy, off-shoulder or elasticated-neck top.
Design Features:
- Original Garment: An oversized men’s (or women’s) button-down shirt. The larger, the better, as it provides more fabric to work with.
- New Style: A loose, comfortable top with an elasticated neckline (can be worn off-shoulder or as a wide boat neck) and possibly shortened or gathered sleeves.
- Key Elements Kept: The original button placket and hem (to save on hemming!)
Materials You’ll Need:
- Old Button-Down Shirt: 1 large, clean, and ironed shirt.
- Elastic: 1/2 to 1 inch (1.27 to 2.54 cm) wide, enough to comfortably go around your shoulders/upper bust plus a few inches for overlap.
- Matching Thread: All-purpose polyester thread.
- Basic Sewing Supplies: Sewing machine, sharp fabric scissors, measuring tape, fabric chalk/pen, pins, safety pin (for threading elastic), iron, ironing board, seam ripper.
Step-by-Step Tutorial: Button-Down to Stylish Top
1. Prepare Your Shirt
- Lay your shirt flat and smooth.
- Remove the collar: Carefully cut off the collar close to the neckline seam.
- Remove the sleeves: Cut off the sleeves at the armhole seam. You can either use these sleeves for a new design (e.g., ruffles, puffed sleeves) or discard them. For this tutorial, we’ll assume simple sleeves or no sleeves.
- Open side seams (optional, but recommended for sizing): If the shirt is very wide, or you want to adjust the fit around the bust, unpick the side seams from the armpit down. This allows you to re-shape the body of the shirt. If it’s already a good width, you can skip this.
2. Re-Shape the Body (if side seams were opened)
- Try the shirt on (inside out) or use a well-fitting top you own as a guide.
- Pin new side seams, creating a slightly A-line or straight silhouette as desired. Ensure it’s wide enough to pull over your shoulders/bust easily.
- Stitch these new side seams. Trim excess fabric, leaving a 1/2-inch seam allowance. Finish the raw edges with a zigzag stitch or serger if your fabric frays easily.
3. Create the Elastic Casing
- Along the new raw neckline (where the collar was), fold the fabric down towards the wrong side by about 1/4 inch (0.6 cm) and press.
- Fold it down again by an amount slightly wider than your elastic (e.g., if using 1/2-inch elastic, fold down 3/4 inch / 1.9 cm). Press firmly. This creates the casing for your elastic.
- Stitch this casing down, sewing close to the inner folded edge. Leave a 1-2 inch (2.5-5 cm) opening in the casing for threading the elastic.
4. Thread the Elastic
- Measure the elastic to fit comfortably around your shoulders/upper bust. It should be snug enough to stay up but not too tight. Add about 1 inch (2.5 cm) for overlap.
- Attach a safety pin to one end of the elastic. Thread the safety pin through the opening in the casing, guiding the elastic all the way around until both ends emerge from the opening.
- Overlap the two ends of the elastic by 1 inch. Stitch them together securely (using a zigzag stitch is good for elastic).
- Gently pull the elastic into the casing, distributing the gathers evenly. Stitch the opening in the casing closed.
5. Finish Armholes (Optional)
- If you’re keeping it sleeveless, you can simply hem the armholes by folding the raw edge under by 1/4 inch, pressing, then folding again by 1/4 inch and stitching.
- Add Ruffle Sleeves (from original sleeves): Take the cut-off sleeves. You can shorten them, then gather the top edge (where they attached to the shirt) and stitch them back onto the armholes of your new top. Or, if you want a flowy look, just hem the original sleeve cuff and the cut armhole, and the top will be sleeveless.
6. Final Touches
- If you opened side seams, make sure they’re neatly finished.
- Press your new top thoroughly.
You now have a chic new top from an old button-down!
Idea 2: Major Transformation – From T-Shirt to Patchwork Top or Skirt
This idea involves deconstructing the old shirt(s) more significantly and combining pieces to create something entirely different. It’s a great way to use multiple old shirts, especially if they have interesting colors or patterns.
Design Features:
- Original Garment: One or more old t-shirts (or other knit fabric shirts). Great for using shirts with small stains, tears, or graphics you only want to partially use.
- New Style:
- Patchwork Top: A unique top with contrasting panels, potentially using a graphic from one shirt as a focal point.
- Patchwork Skirt: A comfy, elastic-waist skirt made from various t-shirt panels.
- Key Skill: Working with knit fabrics (which don’t fray but can stretch), and basic patchwork.
Materials You’ll Need:
- Old T-Shirts: 2-4 clean, ironed t-shirts of varying colors/patterns (or just one for a simpler patchwork).
- Elastic: For the skirt waistband (1-1.5 inches / 2.5-3.8 cm wide), enough to fit your waist plus overlap.
- Matching Thread: All-purpose polyester or stretch thread (recommended for knit fabrics).
- Basic Sewing Supplies: Sewing machine (with a ballpoint/stretch needle and walking foot if available), sharp fabric scissors or rotary cutter, measuring tape, fabric chalk/pen, pins/clips, iron, ironing board, seam ripper.
Step-by-Step Tutorial: T-Shirt to Patchwork Skirt (or Top)
Let’s focus on a patchwork skirt, as it’s a popular and manageable project for upcycling t-shirts. The principles can be adapted for a patchwork top.
1. Deconstruct and Prepare T-Shirts
- Lay each t-shirt flat. Cut off the sleeves, collar, and bottom hem.
- Cut along one side seam to open the t-shirt into a flat rectangle.
- Iron all fabric pieces smooth.
2. Plan Your Patchwork Design
- Measure your waist/hips: Decide where you want the skirt to sit. Measure your waist/hip circumference.
- Determine skirt length: Measure from your waist/hip to your desired hemline (e.g., knee-length, midi). Add 1 inch (2.5 cm) for seam allowances and hem.
- Calculate panel size: For a simple A-line or straight skirt, you’ll typically need 2 main panels (front and back).
- Width: Your hip measurement divided by 2, plus 4-6 inches (10-15 cm) for ease and seam allowances. This will give you room to move and add a slight flare.
- Height: Your desired skirt length.
- Sketch your patchwork: On paper, sketch how you want to combine your t-shirt pieces to form two panels of your desired width and height. Play with different colors and patterns. If using a graphic, position it strategically.
3. Cut and Piece Patchwork Panels
- Cut your t-shirt fabric into squares, rectangles, or strips according to your design. Remember to add 1/2-inch (1.27 cm) seam allowance to all cut edges that will be sewn.
- Begin sewing pieces together, right sides together, using a 1/2-inch (1.27 cm) seam allowance.
- Important for knits: Use a stretch stitch on your machine (often a narrow zigzag or a specific lightning bolt stitch) to prevent seams from breaking when stretched.
- Press seams open after each join to reduce bulk and keep your fabric flat.
- Continue piecing until you have two main rectangles that are slightly larger than your target skirt panel dimensions (e.g., 1 inch larger on each side to trim neatly).
- Lay your patchwork flat, and use your ruler and rotary cutter (or scissors) to precisely cut out your two final skirt panels to your desired dimensions (e.g., 16-18″ W x 20″ H).
4. Sew the Skirt Body
- Place the two patchwork skirt panels right sides together, aligning the side edges.
- Stitch down both side seams using a 1/2-inch (1.27 cm) seam allowance and a stretch stitch. Backstitch at the beginning and end.
- Press seams open.
5. Create the Waistband Casing
- At the top raw edge of the skirt, fold the fabric down towards the wrong side by 1/4 inch (0.6 cm) and press.
- Fold it down again by an amount slightly wider than your chosen elastic (e.g., if using 1-inch elastic, fold down 1.25 inches / 3.17 cm). Press firmly.
- Stitch this casing down, sewing close to the inner folded edge. Leave a 1-2 inch (2.5-5 cm) opening for threading the elastic.
6. Thread the Elastic
- Measure elastic to fit comfortably around your waist. It should be snug but not dig in. Add 1 inch (2.5 cm) for overlap.
- Attach a safety pin to one end of the elastic. Thread it through the casing until both ends emerge.
- Overlap the elastic ends by 1 inch and stitch securely (zigzag stitch).
- Gently pull the elastic into the casing, distributing gathers evenly. Stitch the opening in the casing closed.
7. Hem the Skirt
- At the bottom raw edge of the skirt, fold the fabric up towards the wrong side by 1/4 inch (0.6 cm) and press.
- Fold up again by 1/2 inch (1.27 cm) and press. Stitch this hem in place, sewing close to the inner fold. Use a stretch stitch.
You’ve now got a brand new, unique patchwork skirt from your old t-shirts!
Tips for Successful Refashioning:
- Start Simple: If you’re new to sewing or refashioning, pick a project with minimal deconstruction and straightforward cuts.
- Use Existing Hems/Plackets: Wherever possible, utilize the original hems, button plackets, or cuffs of the shirt. This saves time and gives a professional finish.
- Measure Twice, Cut Once: Always double-check your measurements, especially when dealing with limited fabric from old clothes.
- Pressing is Key: Pressing your seams flat after each step is vital for a polished look, especially with patchwork.
- Don’t Be Afraid to Experiment: The beauty of refashioning is that you’re working with fabric that would otherwise go to waste. If a project doesn’t turn out perfectly, you’ve still learned something!
What kind of old shirts are you planning to transform? Knowing the fabric type might help in offering more specific tips!
Video Tutorial