

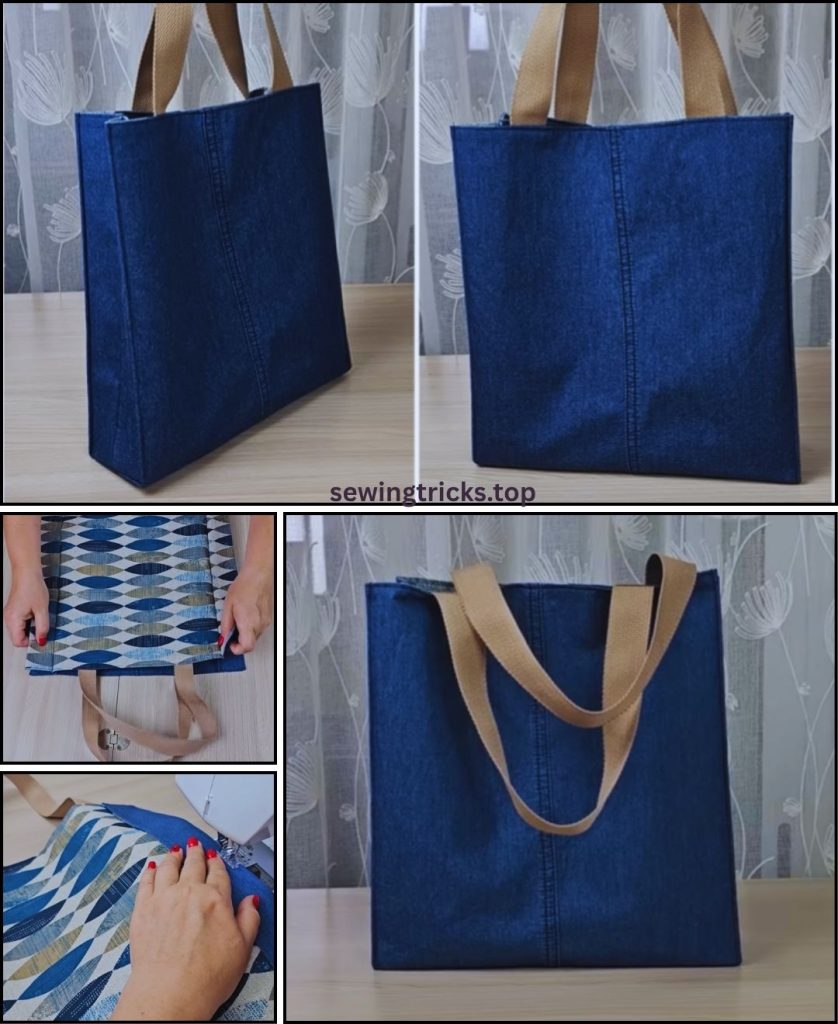
A DIY beach bag made from old jeans is a fantastic way to upcycle and create a sturdy, unique accessory. Denim is naturally durable and perfect for handling sand, sunscreen, and wet towels. This tutorial will guide you through making a practical and stylish beach bag, utilizing the best features of your old jeans.
We’ll create a boxy, roomy bag, approximately 16 inches (40 cm) wide, 14 inches (35 cm) tall, and 6 inches (15 cm) deep, a great size for a day at the beach.
How to Sew a DIY Beach Bag From Old Jeans
I. Planning & Gathering Your Materials
Careful preparation of your materials is key to a smooth sewing process and a durable bag.
- Old Jeans:
- Quantity: 1-2 pairs of adult-sized jeans. Look for straight-leg or bootcut jeans if possible, as they offer more continuous fabric in the legs. Sturdy, non-stretch denim works best for durability. Avoid very thin or heavily distressed/ripped areas unless you plan to reinforce them.
- Preparation: Wash and thoroughly dry your jeans before cutting. This prevents shrinkage later and makes them easier to work with.
- Lining Fabric (Highly Recommended):
- Type: Durable cotton (quilting cotton, broadcloth), canvas, or even a water-resistant fabric like ripstop nylon or PUL for a truly spill-proof interior.
- Quantity: Approximately 1 yard (0.9 meters) for a bag of this size.
- Preparation: Wash and iron.
- Interfacing (Optional, but Recommended for Structure):
- Type: Medium to heavy-weight fusible interfacing. This will add body and help your bag stand up nicely.
- Quantity: Approximately 1 yard (0.9 meters).
- Handles:
- Option 1: Cotton Webbing: 1.5 – 2 inches (3.8 – 5 cm) wide, about 1.5 yards (1.4 meters) total (two 26-inch / 66 cm pieces). This is the easiest and most common option.
- Option 2: Denim from Jeans: You can create sturdy handles from the jean waistbands or leg scraps (see detailed instructions in Step III.3).
- Matching Thread: All-purpose polyester thread. A stronger, heavy-duty thread is excellent for denim, but an all-purpose thread will work if your machine handles it well.
- Basic Sewing Tools:
- Sewing machine (a denim needle or heavy-duty needle, size 16 or 18, is highly recommended for sewing through multiple layers of denim).
- Walking foot (optional but highly recommended): This attachment helps feed multiple thick layers of fabric evenly through your machine.
- Sharp Fabric Scissors or Rotary Cutter and Mat.
- Measuring Tape or Long Ruler.
- Fabric Chalk or Mark-B-Gone Pen.
- Plenty of Pins or Fabric Clips (clips are especially useful for thick denim layers).
- Iron and Ironing Board.
- Seam Ripper (your essential tool for any sewing project!).
II. Prepare & Cut Your Fabric Pieces
Accuracy in cutting is crucial for a well-shaped bag. We’ll use a consistent 1/2-inch (1.27 cm) seam allowance throughout, unless otherwise specified.
1. Deconstruct Your Jeans
- Lay your washed and ironed jeans flat.
- Cut off the legs just below the crotch seam, cutting straight across.
- Carefully unpick (seam rip) the inseam (the inner leg seam) and the outer leg seam of both legs. This will give you large, flat pieces of denim. Press them flat.
- Harvest Pockets (Optional): If you want to use the back pockets of the jeans as exterior pockets on your bag, carefully cut them off, leaving about a 1/2-inch (1.27 cm) seam allowance around the existing stitched edges of the pocket.
2. Cut Main Bag Panels (Denim & Lining)
- Denim Exterior Panels: From your flattened denim, cut 2 rectangles, 17 inches wide x 15 inches tall (43 cm W x 38 cm H). These will form the main front and back of your bag.
- Lining Panels: From your lining fabric, cut 2 rectangles, 17 inches wide x 15 inches tall (43 cm W x 38 cm H).
- Interfacing (If using): Cut 2 rectangles, 16 inches wide x 14 inches tall (40.6 cm W x 35.6 cm H). These are slightly smaller to reduce bulk in the seam allowances.
- Fuse Interfacing: Following the manufacturer’s instructions, fuse the interfacing to the wrong side of your two denim exterior panels. Center the interfacing so there’s a 1/2-inch border of denim exposed on all sides for the seam allowance.
3. Prepare Handles
- If using Webbing: Cut two pieces of webbing, each 26 inches (66 cm) long.
- If making Denim Handles:
- From your jean scraps, cut two rectangles, each 27 inches (68.5 cm) long x 4 inches (10 cm) wide.
- Fold each strip in half lengthwise (wrong sides together) and press firmly.
- Open the fold, then fold each long raw edge in towards the center crease you just made. Press again.
- Fold the entire strip in half lengthwise once more, enclosing all raw edges. Press firmly. You should now have a strip that is about 1 inch (2.5 cm) wide.
- Topstitch along both long edges of each handle, close to the folded edges. This secures the folds and adds strength.
III. Let’s Start Sewing Your Beach Bag!
Use your denim needle for all denim sections. A walking foot is highly recommended for sewing through multiple thick layers smoothly.
Step 1: Add Exterior Pockets (Optional)
- If using jean back pockets:
- Take one of your denim exterior panels (with interfacing fused). Lay it right side up.
- Decide where you want to place the pocket (e.g., centered near the top edge, or lower down).
- Place the pocket onto the panel, ensuring it’s straight. Pin securely in place (clips work well here).
- Stitch the pocket onto the bag panel close to the existing stitched edges of the pocket. Reinforce the top corners with a small triangle or bar tack stitch for extra durability, as pockets get a lot of use.
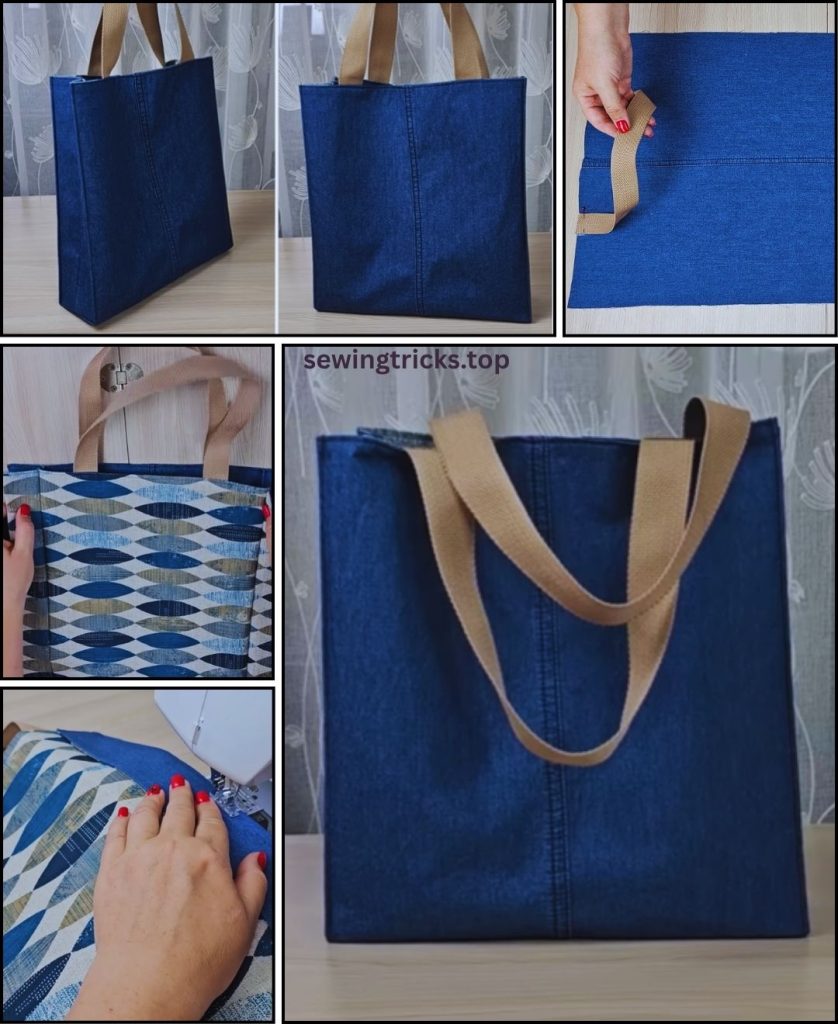
Step 2: Attach Handles
- Take one denim exterior panel (with any pockets attached) and lay it right side up.
- Measure 4 inches (10 cm) in from each side edge along the top 17-inch raw edge of the panel. Mark these points. These are where your handles will be attached.
- Place the raw ends of one handle onto these marks, aligning the raw edges of the handle with the raw top edge of the denim panel. The handle loop should face downwards onto the bag panel.
- Pin securely. Stitch the handles in place with a strong reinforcing stitch (e.g., stitch a square with an “X” inside it) within the 1/2-inch (1.27 cm) seam allowance. This ensures they are very secure.
- Repeat for the second handle on the second denim exterior panel.
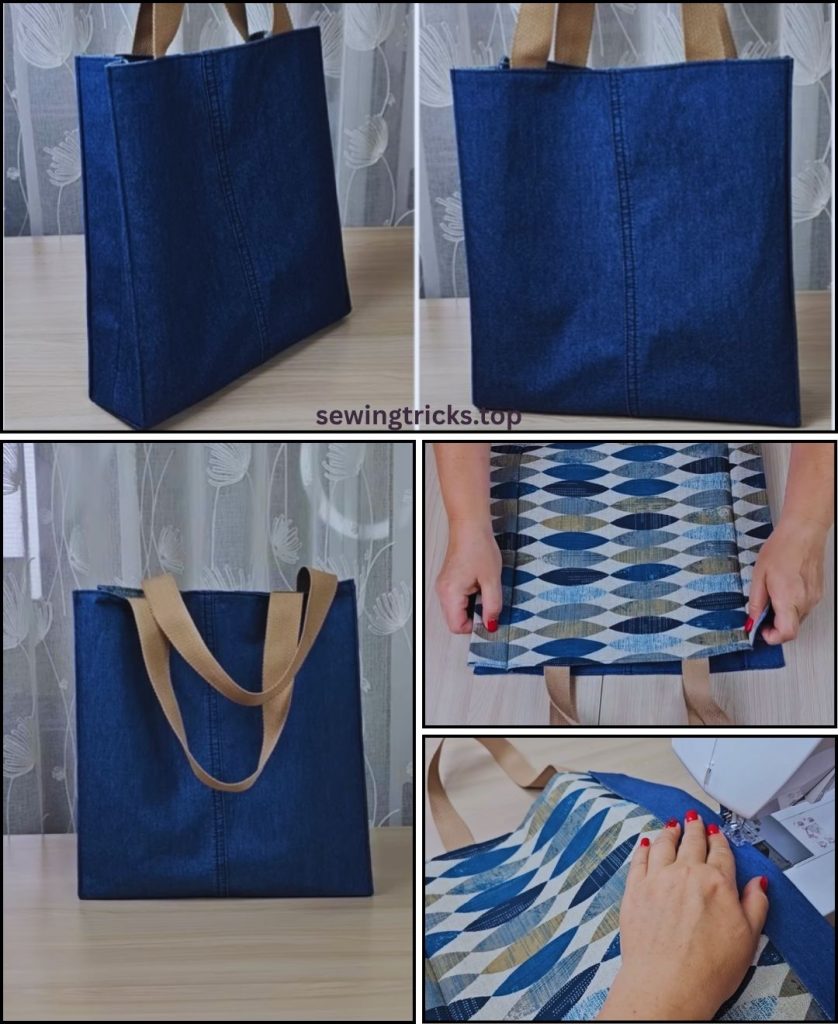
Step 3: Assemble the Exterior Bag
- Place your two assembled denim exterior panels (with handles attached) right sides together, aligning the side seams and the bottom raw edges. Ensure your handle loops are tucked neatly inside so they don’t get caught in the seams.
- Pin securely along the side seams and the bottom raw edge.
- Stitch down both side seams and across the bottom seam, using a 1/2-inch (1.27 cm) seam allowance. Backstitch at the beginning and end of each seam for reinforcement.
- Finish Raw Edges (Recommended): Use a zigzag stitch or serger along all raw seam allowances of the exterior bag to prevent fraying and add durability. Press seams open.
Step 4: Create Boxed Corners for Exterior Bag
This step gives your bag a flat, defined bottom.
- At one of the bottom corners of the exterior bag (still inside out), gently pinch the corner so the previously sewn side seam aligns perfectly with the newly sewn bottom seam. This will naturally form a triangular shape at the corner.
- Measure from the point of this triangle inward along the seam line a distance equal to half of your desired bag depth (e.g., for a 6-inch deep bag, you’ll measure 3 inches / 7.6 cm).
- Draw a straight line perpendicular to the seam at this measured point. This line should be 6 inches (15 cm) long (the total depth of your bag).
- Stitch precisely along the drawn line, backstitching securely at both ends.
- Trim the excess fabric triangle from the corner, leaving about a 1/2-inch (1.27 cm) seam allowance beyond your new stitching line.
- Repeat this exact process for the other bottom corner of the exterior bag.
- Turn the exterior bag right side out. Push out the boxed corners with your fingers or a blunt tool to make them crisp.
Step 5: Assemble the Lining Bag (Repeat Steps 3 & 4, with one crucial modification)
- Place your two lining fabric panels right sides together.
- Stitch down both side seams and across the bottom seam, using a 1/2-inch (1.27 cm) seam allowance.
- IMPORTANT: Leave a 4-5 inch (10-12.7 cm) opening along the center of the bottom seam of the lining. This opening is absolutely crucial for turning the bag right side out later. Backstitch well at the beginning and end of your stitching around this gap.
- Create boxed corners on the lining bag just like you did for the exterior bag (Step 4), ensuring they are the same depth.
- Do NOT turn the lining bag right side out. Keep it inside out.
Step 6: Combine Exterior and Lining
- Keep the exterior bag turned right side out.
- Keep the lining bag turned inside out.
- Carefully insert the exterior bag into the lining bag, so that the right sides of both bags are facing each other.
- Align the top raw edges of the exterior bag and the lining bag. Make sure the side seams of the exterior match up with the side seams of the lining. The handles of the exterior bag should be tucked down between the exterior and lining layers.
- Pin securely all around the top raw edge of the bag.
Step 7: Sew Top Edge and Finish
- Stitch all the way around the top edge of the bag, using a 1/2-inch (1.27 cm) seam allowance. Backstitch at the beginning and end.
- Clip curves/trim bulk: If your top edge isn’t perfectly straight, you might gently clip into the seam allowance (without cutting stitches) to help the seam lie flat when turned. Trim any excess bulk from the seam allowance, especially where the handles are attached.
Step 8: Turn Bag Right Side Out & Close Opening
- Reach into the opening you left in the bottom seam of the lining (from Step 5).
- Slowly and carefully pull the entire bag (exterior, lining, handles – everything!) through this opening until it is completely right side out.
- Gently push out all the boxed corners of the main bag and the lining, using a point turner or a blunt object (like a chopstick) to make them crisp and well-defined.
- Close the Lining Opening: Go to your ironing board. Press the raw edges of the opening in the bottom of the lining under by 1/2 inch (1.27 cm) so they meet neatly. Align these pressed edges and pin or clip them together. Stitch this opening closed by machine (sewing very close to the folded edge for a neat finish) or by hand using an invisible ladder stitch for a truly seamless look.
- Finally, push the lining down into the main bag, ensuring it sits smoothly inside and the corners align.
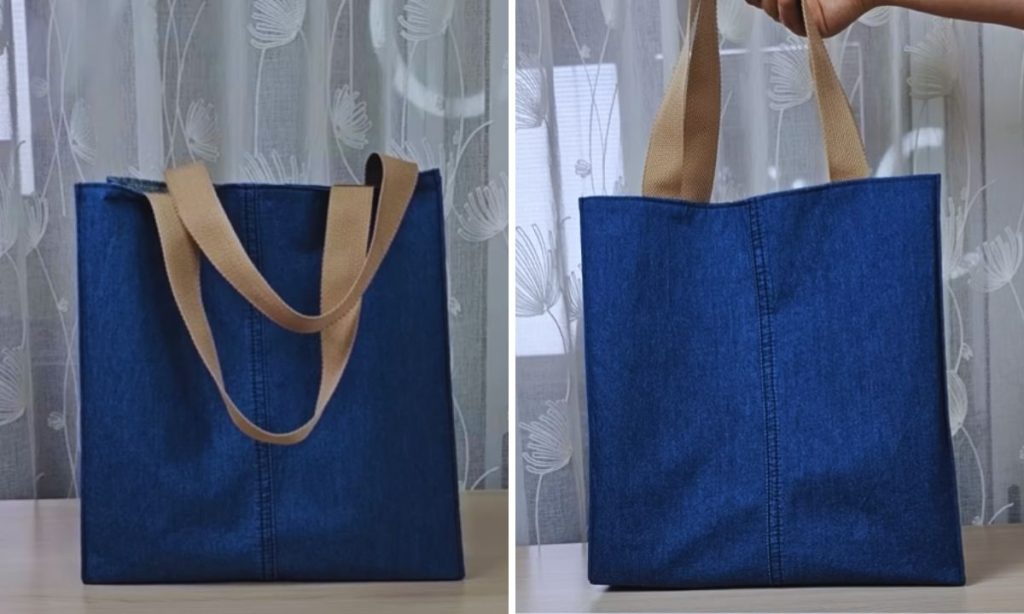
- Give your finished bag a good final press to remove any wrinkles and make it look crisp.
Congratulations! You’ve successfully sewn a unique and durable DIY Beach Bag from Old Jeans! It’s ready for all your sandy adventures and a fantastic testament to sustainable crafting.
What kind of lining fabric did you choose for your bag, and what exciting beach trip will it accompany you on first?


