
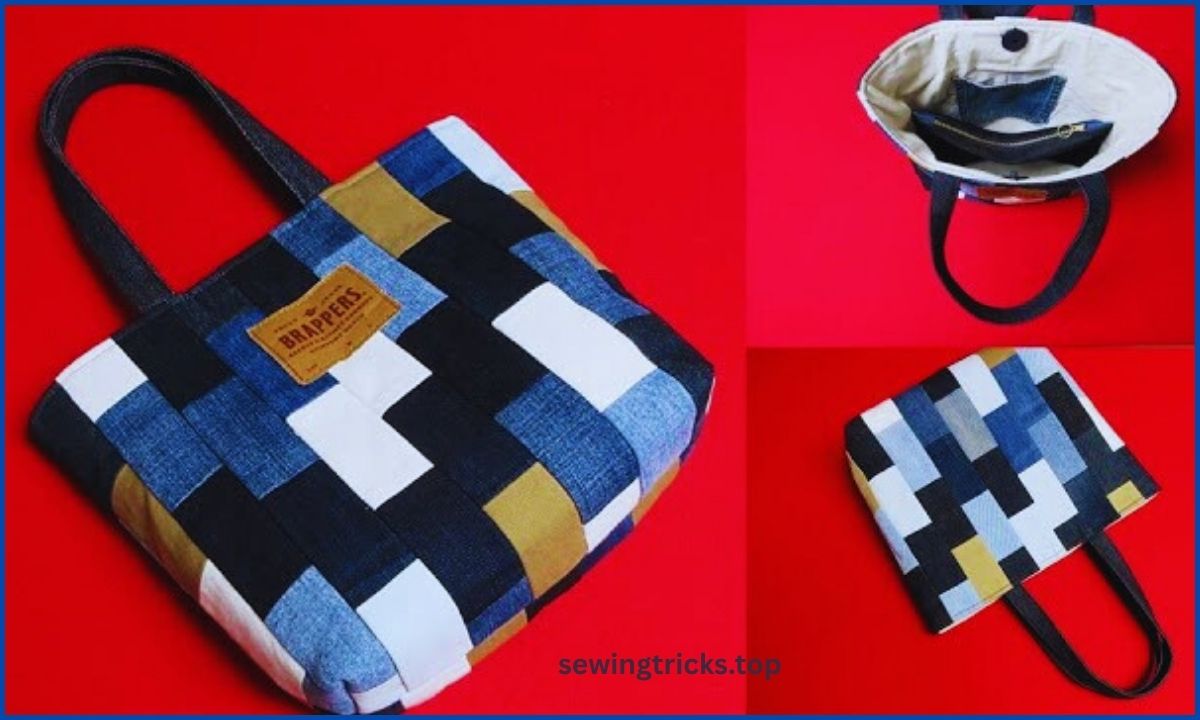
I love this project! A “partition tote bag” is a fantastic way to organize your items, whether you’re carrying craft supplies, groceries, or baby essentials. Using scrap fabric makes it a fun, sustainable, and one-of-a-kind project.
This detailed tutorial will guide you through making a structured tote bag with three interior compartments. The design is simple, effective, and perfect for a variety of scrap fabrics. We’ll aim for a finished bag size of approximately 13 inches wide by 10 inches tall by 5 inches deep.
I. Planning & Gathering Your Materials
Careful preparation is key for a well-made and durable bag. The “partition” is a key feature, so precise measurements are important.
- Scrap Fabrics:
- Exterior: An assortment of sturdy woven fabrics like canvas, denim, or even upholstery fabric. Having a few different colors or patterns will make the bag look intentionally scrappy and cute. You’ll need enough to create two 14″x11″ panels and a 27″x6″ side band.
- Lining & Partitions: You can use a consistent fabric for this, such as quilting cotton or a sturdy poplin. You’ll need about 1 yard total.
- Preparation: Make sure all your scraps are pre-washed and ironed flat.
- Interfacing/Stabilizer (Crucial for Structure):
- Type: You’ll need medium-weight fusible interfacing (e.g., Pellon SF101 Shape-Flex) for the lining and partitions. For the exterior, consider a heavy-weight fusible stabilizer (e.g., Pellon 809 Decor Bond) to give the bag a very crisp, structured feel.
- Quantity: Approximately 1 yard of each type.
- Webbing for Handles: Two pieces of cotton or polypropylene webbing, 1 inch wide and 22 inches long.
- Matching Thread: All-purpose thread for piecing and a heavy-duty thread for topstitching.
- Basic Sewing Tools: Sewing machine, sharp fabric scissors or a rotary cutter, ruler, fabric marker, plenty of pins or clips, and an iron.
II. Step-by-Step Sewing Instructions
We will use a consistent 1/2-inch (1.27 cm) seam allowance throughout this tutorial.
1. Cut the Fabric Panels
- From your Exterior Scraps:
- Main Exterior Panels: 2 pieces, 14 inches wide by 11 inches tall.
- Side/Bottom Band: 1 piece, 27 inches long by 6 inches tall.
- From your Lining Scraps:
- Main Lining Panels: 2 pieces, 14 inches wide by 11 inches tall.
- Side/Bottom Lining Band: 1 piece, 27 inches long by 6 inches tall.
- Partition Panels: 2 pieces, 14 inches wide by 6 inches tall.
- From your Interfacing/Stabilizer:
- Cut and fuse the appropriate interfacing to the wrong side of all corresponding fabric panels.
2. Prepare and Assemble the Partition
- Make the partition unit: Take the two Partition Panels and place them right sides together. Sew them together along one of the 14-inch sides.
- Create the seams: Open the panel up and press the seam open. This long panel is what will form the two dividers.
- Mark the partition placement: On this long panel, mark a straight line down the center, perpendicular to the seam you just sewed. This will be your first partition line. Then, mark a line 5 inches away from the first line on either side. These three lines are where you will attach the partition to the bottom of the bag.
3. Assemble the Bag’s Exterior Shell
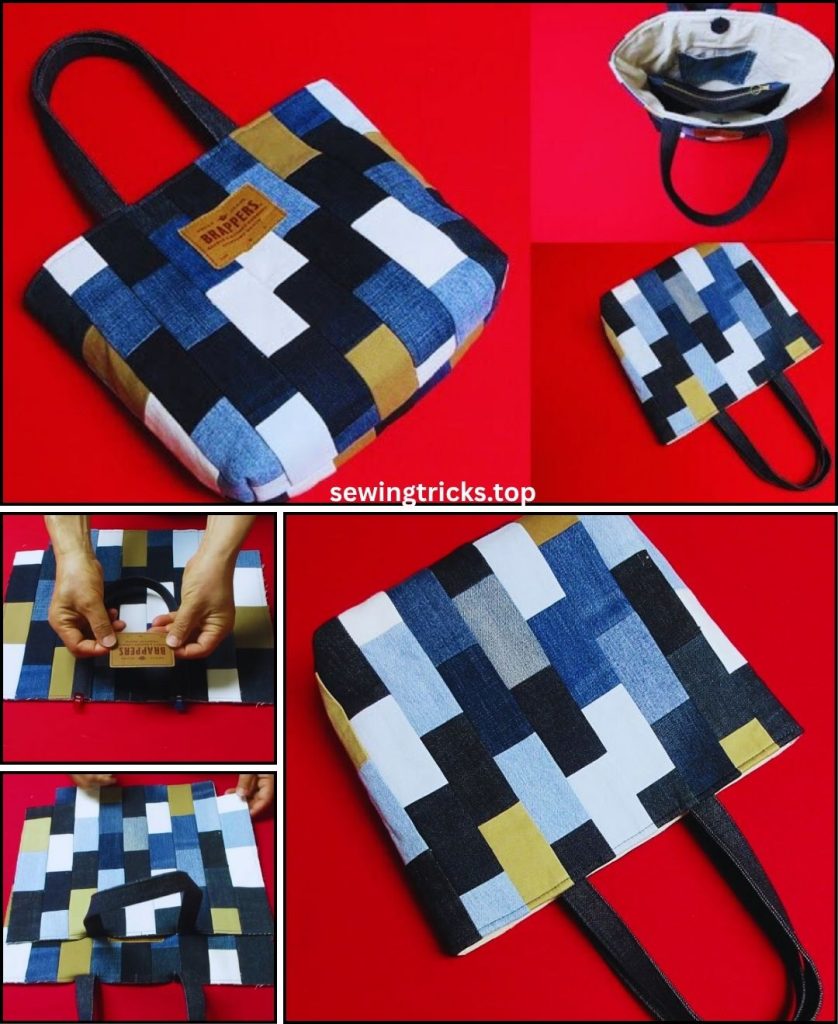
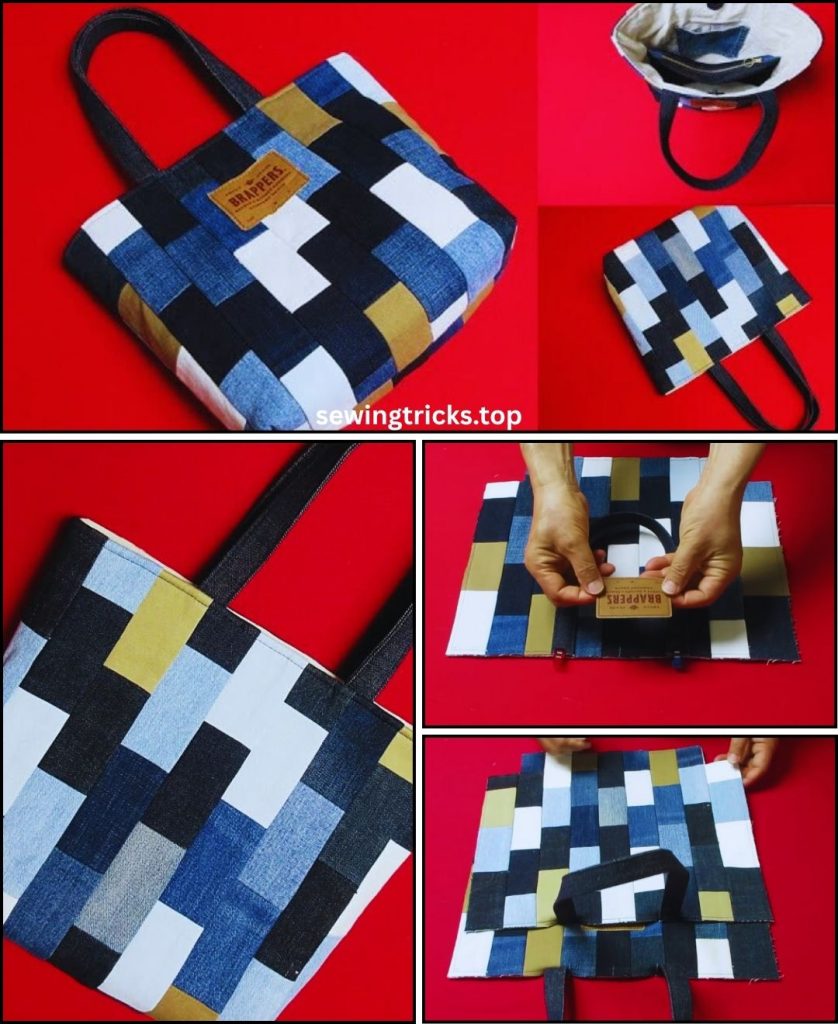
- Attach the handles: On one of your exterior panels, mark spots 3 inches in from each side along the top edge. Place the ends of one webbing handle on these marks, aligned with the raw edge. Stitch securely with a box stitch (a square with an “X” inside it) inside the 1/2-inch seam allowance. Repeat for the second handle on the second exterior panel.
- Create the exterior body: Fold the long side/bottom band into a loop and stitch the short ends together. With right sides facing, pin one of the main exterior panels to the side/bottom band, starting at the bottom center. Stitch all the way around, clipping the seam allowance of the band at the corners to help it curve. Repeat with the second exterior panel.
4. Assemble the Lining Shell with Partitions
- Create the lining body: Sew the lining panels and side/bottom band together just like you did for the exterior. Crucially, leave a 5-inch opening in the bottom seam of the side/bottom band for turning the bag right side out later.
- Attach the partition: Turn the lining inside out. Find the bottom of the lining bag and mark the center. Place the center of your partition panel on the center of the bottom lining seam. Pin the partition in place, matching your marked lines from Step 2 to the bottom of the bag.
- Stitch the partition: Sew the partition to the bottom of the lining bag along the three marked lines. This will divide the bottom of the lining into three sections.
5. Combine and Finish the Bag
- Insert the exterior into the lining: Turn the exterior bag right-side out and the lining bag inside-out. Place the exterior bag inside the lining bag, so their right sides are facing. The handles should be tucked down between the layers. Align the top raw edges and all seams. Pin or clip securely.
- Stitch the top: Sew all the way around the top edge with a 1/2-inch seam allowance.
- Turn and close: Pull the entire bag right-side out through the opening in the lining’s bottom. Push out the corners and seams. Press the seam allowances of the opening in the lining and stitch it closed by hand or machine.
- Topstitch: For a final touch, topstitch around the entire top opening of the bag, about 1/4 inch from the edge. This gives your bag a clean, finished look and helps the top hold its shape.


