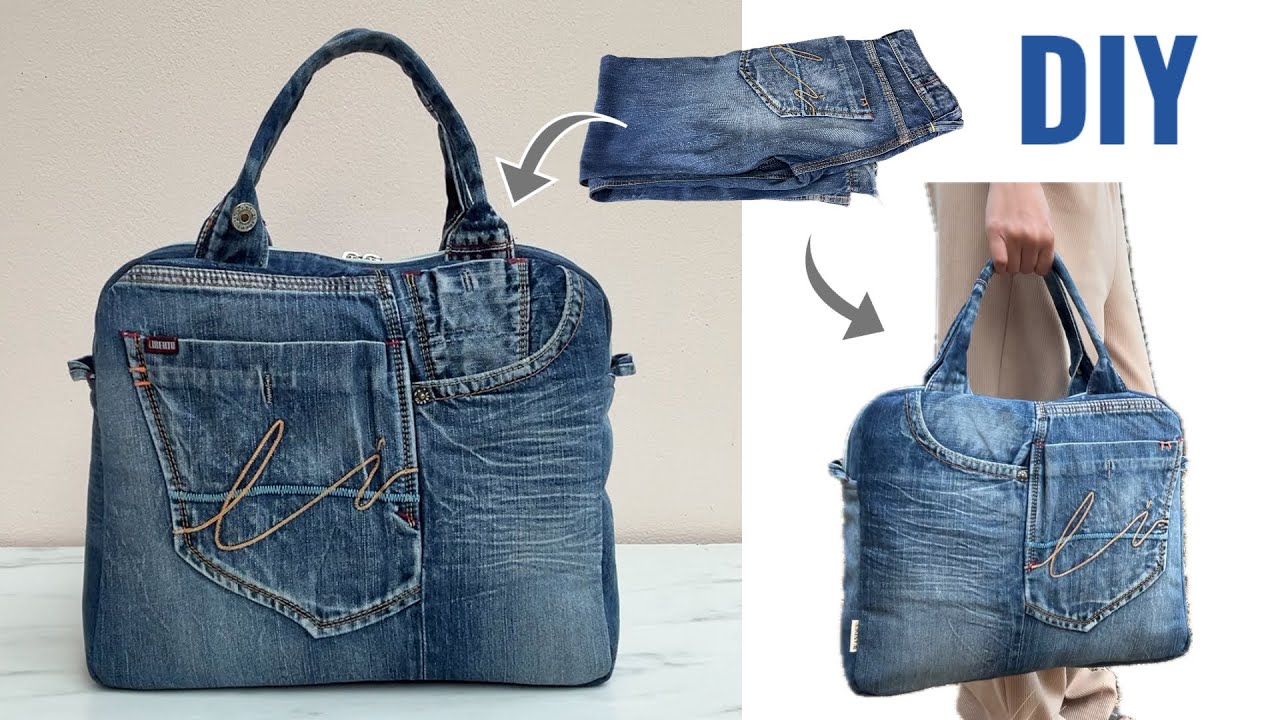
This is a fantastic upcycling project that combines the durability of denim with the security of a zipper closure. A denim zippered tote is practical, stylish, and can withstand years of use. This tutorial provides the detailed steps for constructing a robust, fully lined tote with a professional recessed zipper closure.
The Ultimate Upcycled Denim Zipper Tote Bag Tutorial
I. Project Overview & Denim Harvesting
- Goal: To construct a large, structured tote bag using denim from old jeans, featuring a secured, recessed zipper top.
- Finished Dimensions (Approximate): 16 inches wide x 14 inches tall x 4 inches deep.
- Skills Learned: Working with heavy denim, securing straps, boxing corners, and installing a recessed zipper.
- Denim Source: You will need at least two pairs of large adult jeans (or one very large pair) to secure enough continuous fabric for the main panels and straps.
The Denim Harvest
- Wash and Dry the jeans.
- Deconstruct: Carefully use a seam ripper to remove the back pockets (we will reuse these on the exterior). Cut off the legs just below the crotch. Slit open the inner leg seams and iron the fabric flat.
- Waistband: Decide if you want to use the waistband as part of the exterior design or cut it off. For this design, we will integrate the straps into the main body fabric.
II. Materials & Tools (Denim Specific)
Working with multiple layers of denim requires specialized tools to prevent needle breakage and machine strain.
1. Materials
- Exterior Fabric: Denim from old jeans.
- Lining Fabric: 1 yard of sturdy cotton fabric (quilting cotton is fine).
- Recessed Zipper: One nylon coil zipper, at least 18 to 20 inches long. (Nylon is easier to sew through than metal).
- Interfacing: 1 yard of heavyweight fusible interfacing (e.g., Pellon 809 or Decovil Light). This is essential for a bag this size to prevent slouching.
- Thread: All-purpose polyester for construction, and a spool of Topstitching Thread (often yellow or gold) for visible seams.
2. Essential Tools
- Denim Needle: Size 100/16 or 110/18. (Do not use a universal needle!)
- Zipper Foot: Required for the recessed zipper installation.
- Walking Foot (Optional but recommended): Helps feed thick layers of fabric evenly.
- Clips: Sewing clips are better than pins for heavy denim.
- Iron & Ironing Board: Crucial for fusing and pressing thick seams flat.
III. The Pattern – Cutting Guide
We will use a 1/2-inch (1.27 cm) seam allowance for all steps unless otherwise noted.
| Piece | Quantity | Dimensions (Width x Height) | Fabric Source |
| Exterior Main Panel | (2) | 17 inches x 15 inches | Denim |
| Lining Main Panel | (2) | 17 inches x 15 inches | Lining Fabric |
| Recessed Zipper Panel | (2) | 17 inches x 2 inches | Lining or light Denim |
| Strap Strips | (2) | 4 inches x 30 inches | Denim (preferably solid sections) |
| Interfacing | (2) | 17 inches x 15 inches | Heavyweight Fusible |
IV. Step-by-Step Sewing Instructions
Phase 1: Preparation and Details
- Fuse Interfacing: Iron the heavy-duty fusible interfacing to the wrong side of both Exterior Main Panels. Take your time to ensure a strong bond.
- Attach Pockets: Take the back pockets you removed from the jeans. Pin them centered and approximately 4 inches down from the top edge of the two Exterior Main Panels. Topstitch them securely to the denim, reinforcing the original stitch lines.
- Make the Straps:
- Fuse a 2″ wide interfacing strip down the center of the wrong side of both 4″ x 30″ strap strips.
- Fold the raw edges inward to meet the center crease, then fold the strip in half (all raw edges hidden).
- Using your topstitching thread and a longer stitch length (3.5mm), topstitch along both long edges of the straps, 1/8 inch from the edge.
Phase 2: Assemble the Exterior Shell
- Attach Straps: Lay one Exterior Panel right side up. Measure 3 inches in from the side edges along the top. Align the raw ends of one strap with the top raw edge at these marks. Baste the ends of the strap in place with a 1/4-inch seam allowance. Repeat for the second panel.
- Sew the Body: Place the two Exterior Panels Right Sides Together (RST). Clip the sides and bottom. Sew down the left side, across the bottom, and up the right side. Use Topstitching Thread for this seam if you want the seam to show on the outside.
- Box the Corners:
- Keep the Exterior Shell inside out. Pinch one bottom corner, aligning the side seam and bottom seam to form a triangle.
- Measure 2 inches down from the corner tip and draw a straight line.
- Sew directly on this line. Trim the excess triangle, leaving a 1/2-inch allowance. (This creates a 4-inch boxed bottom).
- Repeat for the second exterior corner.
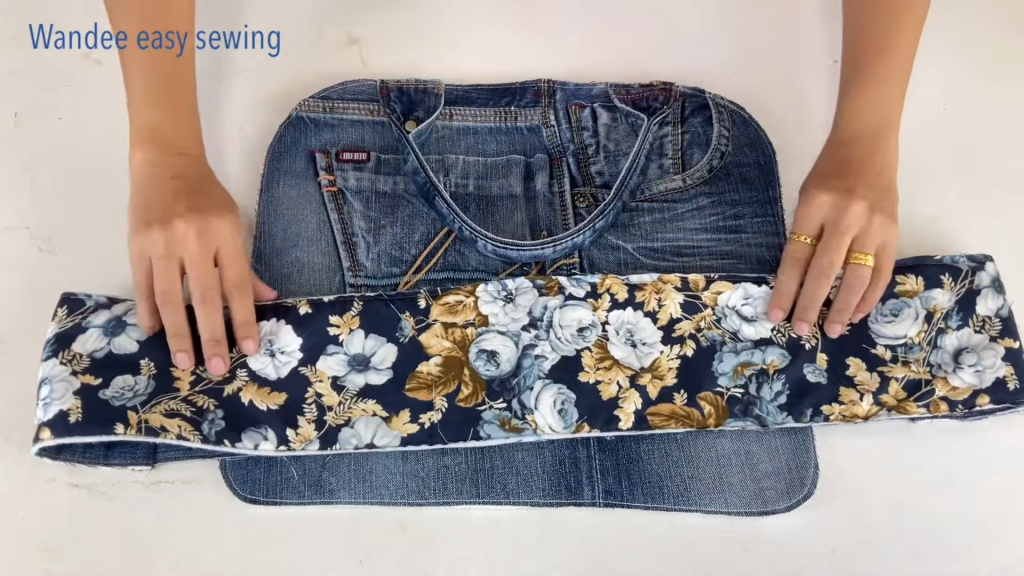
Phase 3: Create the Recessed Zipper Panel
This panel will attach the zipper to the bag and fold inward to secure the top.
- Install Zipper to Panel:
- Take the zipper. Place one Recessed Zipper Panel (lining fabric) RST along one edge of the zipper tape.
- Use your zipper foot to sew them together.
- Flip the fabric away from the zipper and press flat. Topstitch along the fabric, 1/8 inch from the seam.
- Repeat for the second Zipper Panel on the other side of the zipper tape.
- Result: You should have a long rectangle of fabric with the zipper running down the center.
- Finish the Ends: Trim the zipper tape ends so the fabric panels meet neatly. Fold the ends of the fabric panels inward 1/2 inch and stitch them down to create a finished edge.
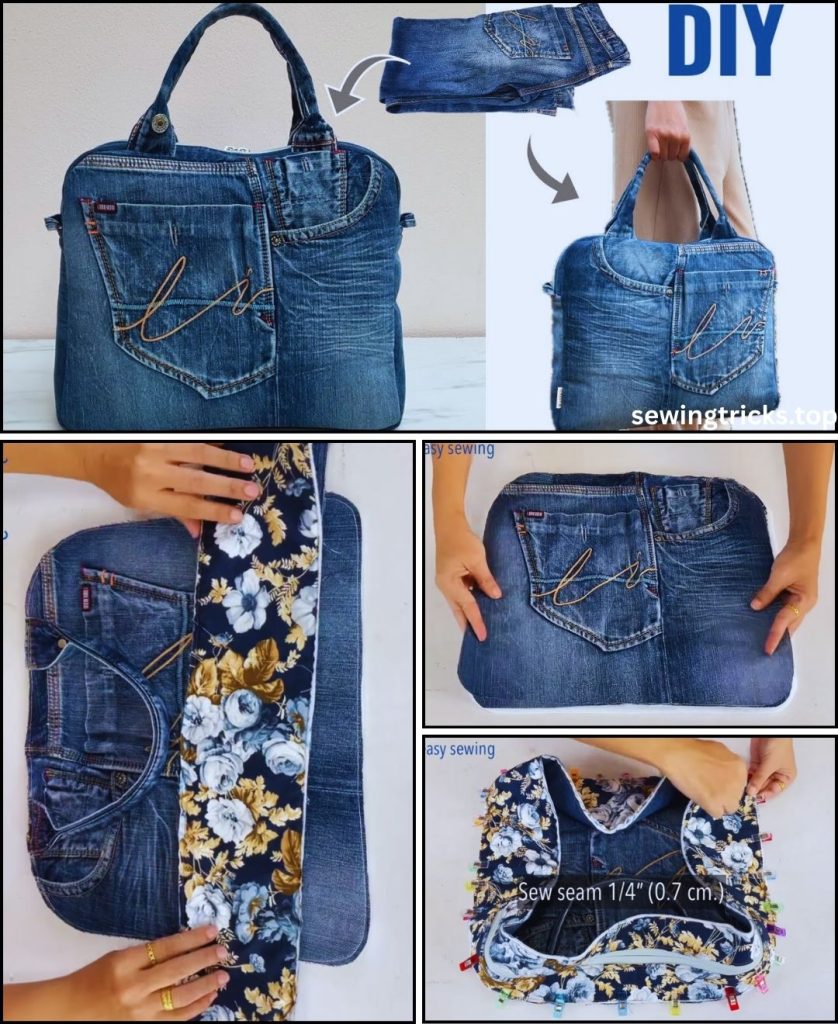
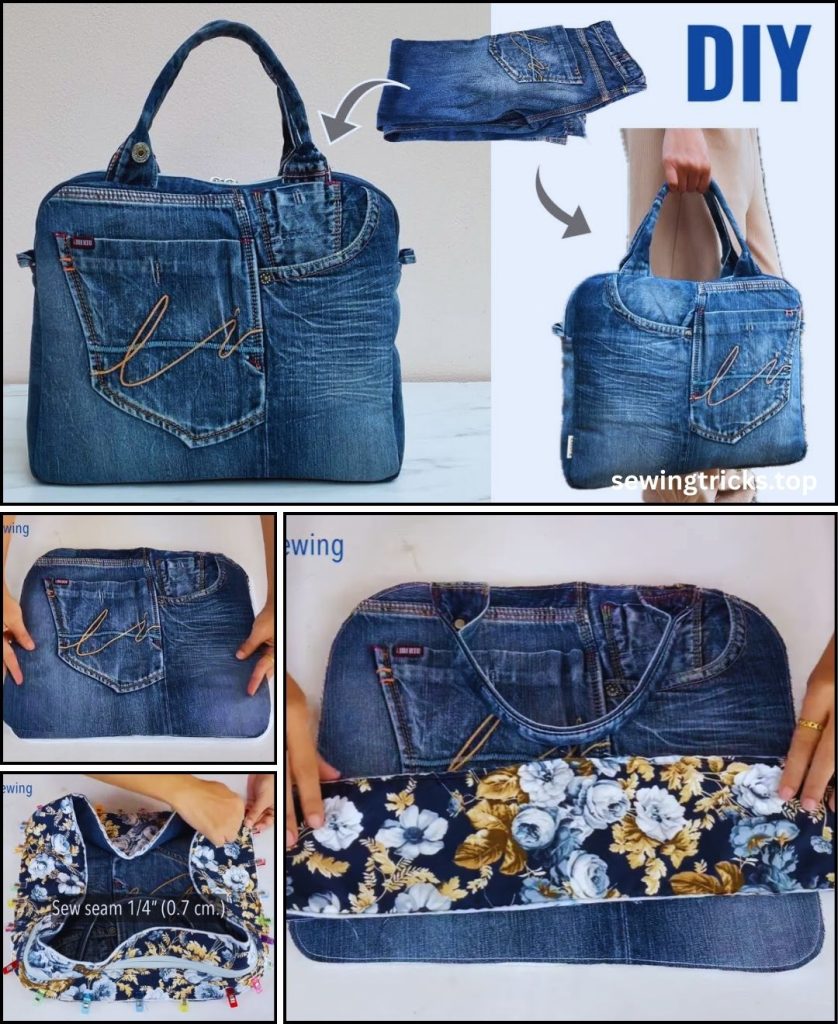
Phase 4: Assemble the Lining Shell
- Place the two Lining Main Panels Right Sides Together (RST).
- Sew the side seams and the bottom seam. DO NOT leave a turning gap. The bag will be turned through the unattached zipper area.
- Box Lining Corners: Repeat the 2-inch boxed corner process (Phase 2, Step 3) for the lining corners.
Phase 5: Final Assembly
- Insert Zipper Panel into Lining:
- Leave the Lining Shell inside out.
- Take the finished Recessed Zipper Panel (the zipper should be open halfway). Pin the raw edges of the zipper panel to the top raw edges of the Lining Shell, matching the seams.
- Sew the zipper panel to the lining, all the way around the top, with a 1/2-inch seam allowance.
- Attach Exterior to Lining:
- Ensure the Exterior Shell is RIGHT SIDE OUT (straps tucked in).
- Place the Exterior Shell inside the Lining Shell, matching the top raw edges. Crucially, the raw edge of the Exterior Shell must align with the raw edge of the recessed zipper panel.
- Match the side seams and clip all the way around the top.
- Sew all the way around the top perimeter with a 1/2-inch seam allowance.
- Turn and Finish:
- Turn the bag right side out by pushing the Exterior Shell through the open zipper in the recessed panel.
- Once turned, push the lining down into the bag.
- Final Press: Press the top rim firmly.
- Topstitch: Sew a final line of topstitching around the entire top opening of the bag, 1/4 inch from the edge, using your topstitching thread. This secures the zipper panel and the lining neatly inside the bag.
V. Pro-Tips for Zippered Denim Projects
- Tension Check: Denim often requires higher top tension. Test your stitch on a scrap of layered denim before sewing the final seams.
- The Hump Jumper: When sewing over the side seams (where the straps are attached), the machine foot will get stuck on the thickness. Use a small folded piece of cardboard or denim scrap placed behind the presser foot to level it out and help the machine glide over the hump.
- Heat Set: When ironing the final seams and boxed corners, press down hard for 10-15 seconds. Denim fibers are stiff, and only intense heat and pressure will fully set the shape, giving you that neat, structured tote look.