A Long, Detailed DIY Upcycling Guide
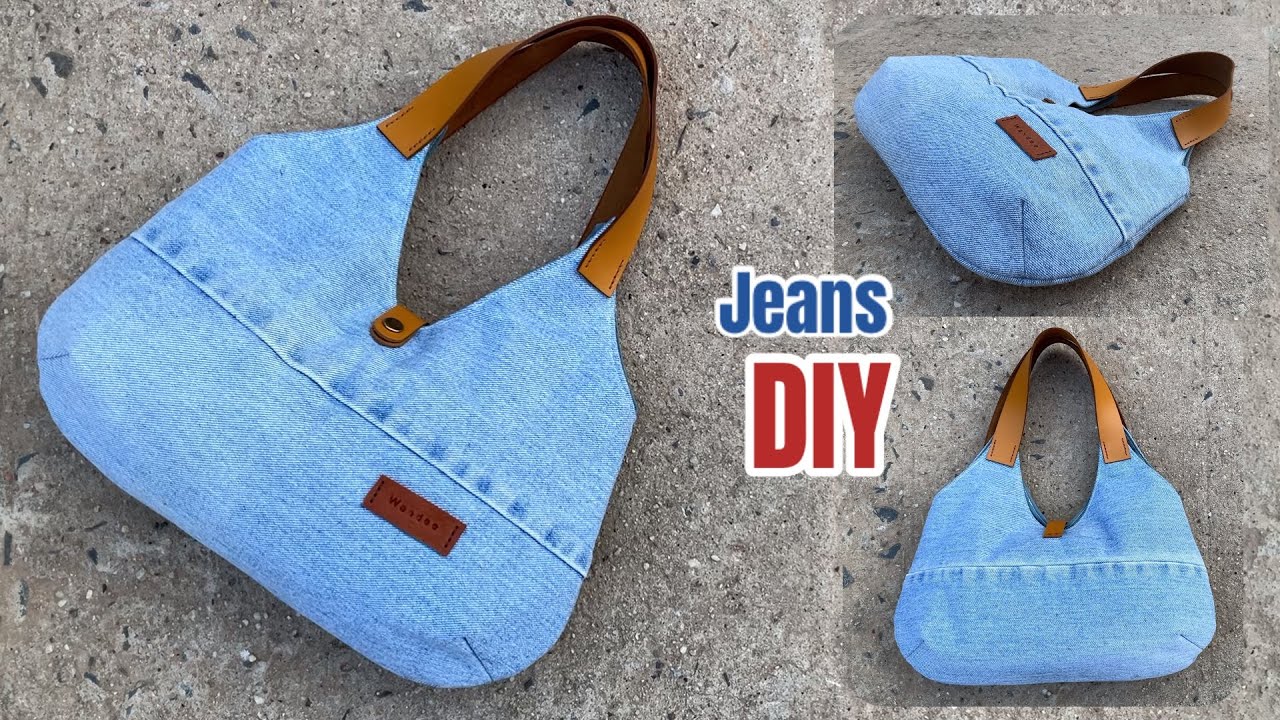
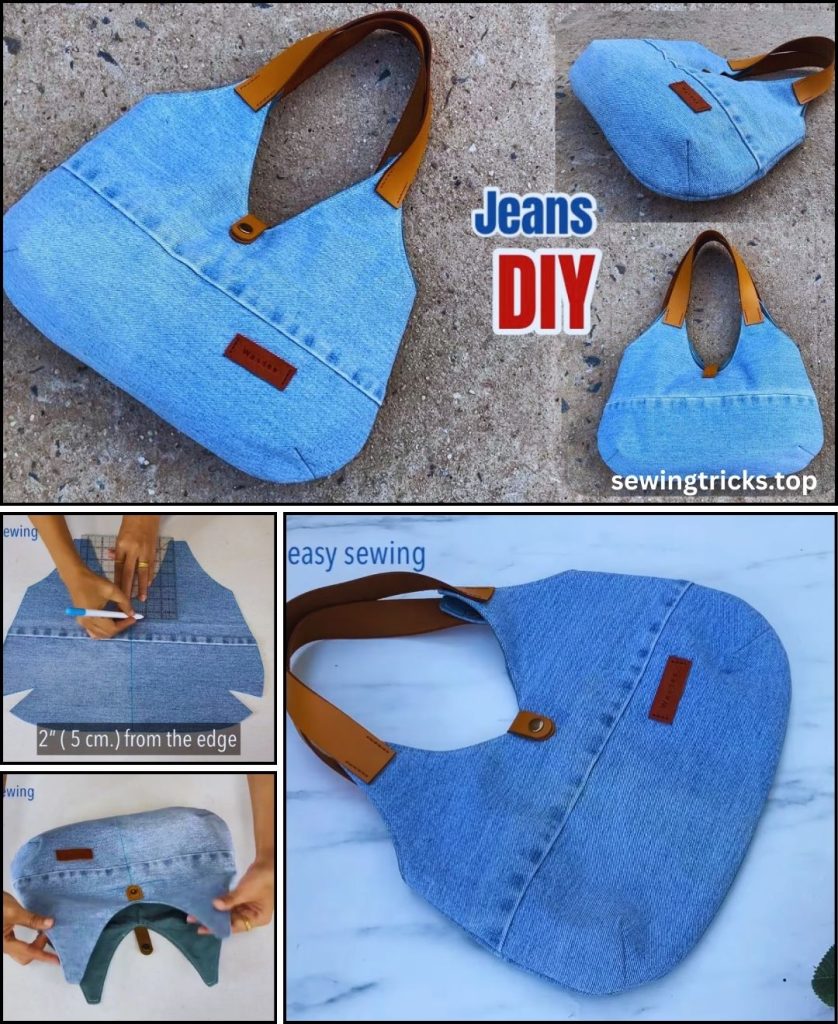
Old jeans have a rare combination of beauty and durability. Their faded textures, stitching, pockets, and worn personality make them perfect for creating stunning handbags that are both stylish and eco-friendly. With a little planning, some basic sewing skills, and creativity, you can transform old denim into a unique handbag that looks boutique-quality.
This guide will walk you through concept, preparation, pattern drafting, sewing techniques, assembly, and decorating, so you end up with a handbag that’s beautiful, strong, and functional.
1. Planning Your Denim Handbag
Before cutting anything, take time to design your bag.
1.1 Consider the Type of Handbag
Choose a style that suits your needs:
- Classic Tote Handbag – roomy and simple
- Structured Purse – compact, with defined shape
- Crossbody Bag – casual and hands-free
- Shoulder Bag with Curved Top – feminine and elegant
- Small Clutch or Wristlet – minimalistic and modern
- Patchwork Bag – colorful, textured, and artistic
1.2 Examine Your Jeans
Identify usable areas:
- Upper thigh fabric (largest flat pieces)
- Back pockets (perfect as external pockets)
- Waistband (can become handles or straps)
- Belt loops (hardware attachments)
- Leather brand label (can be reused as bag label)
Check for:
- Holes or fraying
- Heavy seams to avoid near edges
- Color variations (use faded zones creatively)
1.3 Decide on Bag Size
Standard handbag sizes:
- Small: 10″ × 8″
- Medium: 12″ × 10″
- Large: 14″ × 12″
Write down your chosen measurements before cutting.
2. Materials and Tools
Fabric Materials
- 1–2 pairs of old jeans
- Lining fabric (cotton, canvas, or satin)
- Interfacing or foam stabilizer (optional, for shape)
- Additional denim scraps for pockets or embellishments
Hardware
- Magnetic snap or zipper for closure
- Optional: D-rings, swivel hooks, rivets, purse feet
Tools
- Sewing machine with denim needle (90/14 or 100/16)
- Thread (polyester works best)
- Scissors or rotary cutter
- Chalk or fabric marker
- Iron
- Pins or clips
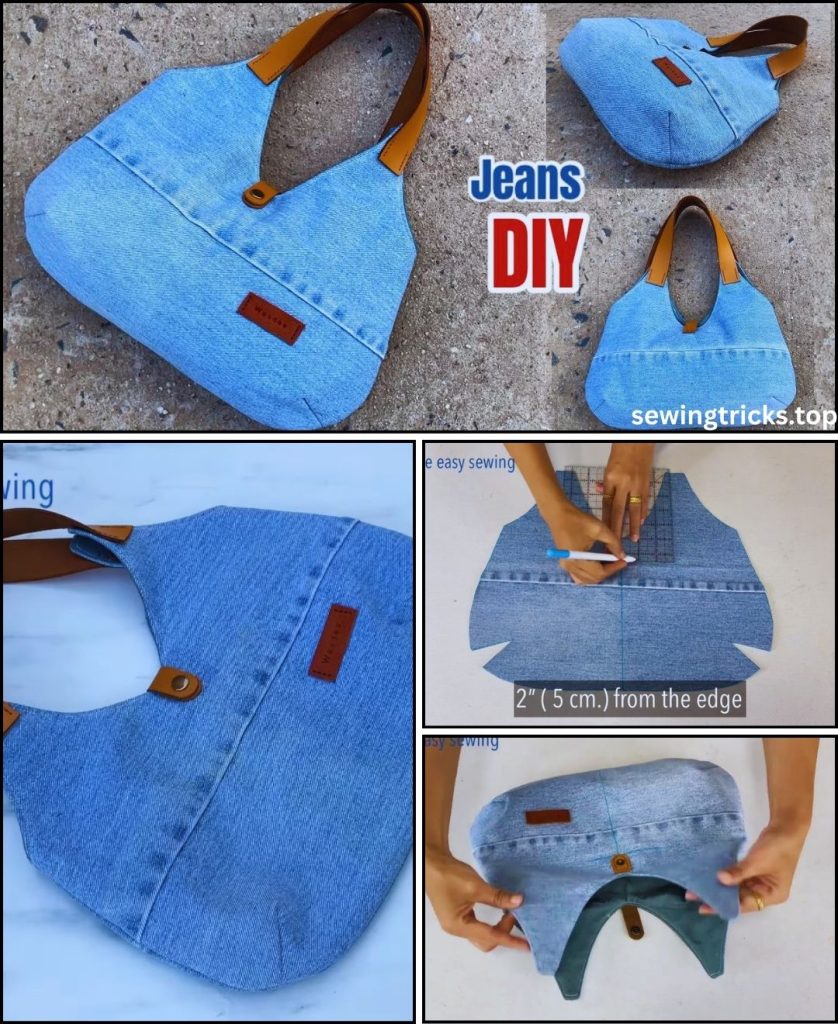
3. Preparing and Cutting the Jeans
3.1 Deconstruct the Jeans
Use scissors or seam ripper to separate:
- Legs (cut open along seams)
- Waistband
- Pockets
- Zipper fly (set aside if you want to reuse as detail)
Press all denim pieces flat.
3.2 Cutting the Main Panels
Use the widest, flattest sections from jean legs to cut:
- 2 main exterior panels (front & back)
- 2 lining panels
For example:
- For a medium handbag: cut 12″ × 10″ rectangles.
3.3 Cutting Side & Bottom Panels (Optional Structured Bag)
For a boxed handbag (with depth):
- Cut a bottom panel: 12″ × 4″
- Cut two side panels: 4″ × 10″
This creates a more professional, store-bought look.
3.4 Optional: Patchwork Panels
If denim pieces are small:
- Cut multiple squares/rectangles
- Sew them together into a large panel
- Press seams open
- Fuse interfacing to strengthen
Patchwork handbags look extremely stylish and unique.
4. Prepare the Handles
Option A: Denim Strap Handles
- Cut 2 denim strips: 22–26″ long × 3″ wide
- Fold lengthwise, right sides together
- Sew along long edge
- Turn right side out
- Press and topstitch both edges
Option B: Reuse Jeans Waistband
- Cut waistband in two equal sections
- Trim ends neatly
- Optional: Add lining to back for comfort
- Topstitch for reinforcement
Option C: Add a Crossbody Strap
Using cotton webbing or denim:
- Attach with D-rings and rivets for strength
5. Add Exterior Features Before Sewing the Bag
5.1 Back Pockets as Decorative Front Pockets
Position jean pockets on the handbag front:
- Centered
- Angled
- Stacked double pockets
Pin and sew around edges.
5.2 Decorative Elements
- Add embroidery, lace, patches, appliqué
- Attach belt loops as pen holders or key holders
- Add the original leather jeans label as a brand badge
5.3 Zipper Pocket (Optional)
Cut a small piece of denim:
- Insert zipper
- Sew onto the bag exterior
This adds both style and utility.
6. Assemble the Handbag Exterior
6.1 Simple Flat Bag (No Side Panels)
- Place exterior panels right sides together
- Sew sides and bottom
- Box the corners (optional for depth)
- Measure 1.5–2″ squares at bottom corners
- Cut or fold and sew across
6.2 Structured Bag with Side/Bottom Panels
- Sew bottom panel to front and back panels
- Sew side panels to bottom
- Attach side panels to main panels
- Reinforce seam intersections
- Press seams open for neat structure
This method gives a true purse shape.
7. Prepare the Lining
7.1 Add Interior Pockets
Interior pockets make your bag functional:
- Slip pockets for phone or wallet
- Zipper pocket for valuables
7.2 Sew Lining Panels Together
Follow the same construction as the exterior:
- Flat style or structured style
- Leave a 4–5 inch turning gap in the lining bottom
8. Install the Bag Closure
Choose a closure type:
8.1 Magnetic Snap (Most Common for Handbags)
- Mark placement: centered at top edge
- Insert snap into lining before sewing the bag together
- Add small interfacing pieces behind snap for strength
8.2 Top Zipper Closure
If you want a zipper handbag:
- Place zipper face-down on exterior panel
- Place lining on top of zipper (sandwich method)
- Sew with zipper foot
- Open and topstitch
- Repeat for other side
This creates a professional finish.

9. Join Exterior and Lining
- Turn exterior right side out
- Keep lining wrong side out
- Insert the exterior inside the lining, right sides touching
- Align top edges
- Insert handles between layers
- Pin securely
- Sew all around the top edge
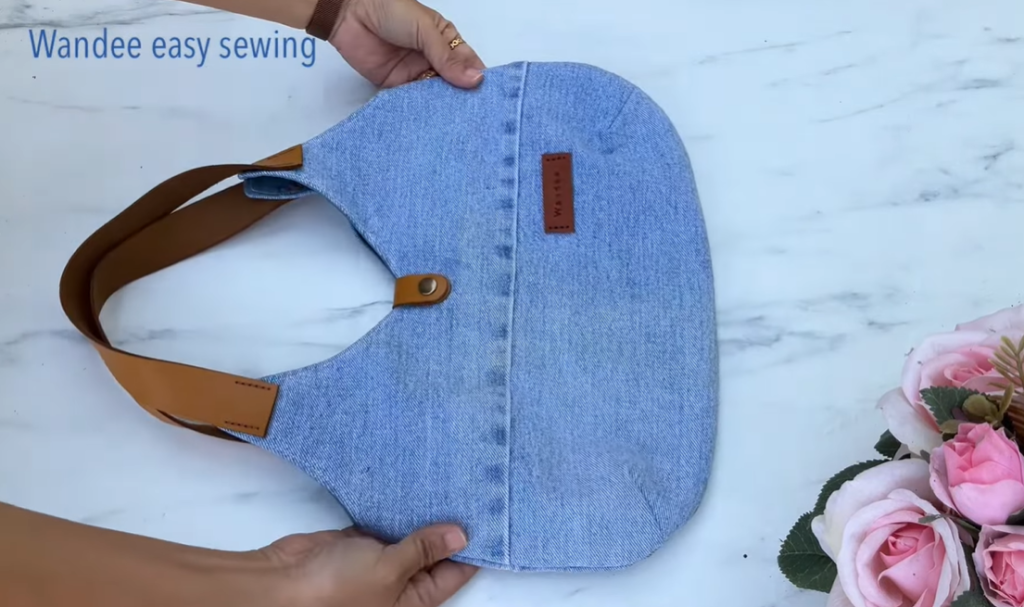
10. Turn the Bag Right Side Out
- Pull bag through the turning gap in lining
- Carefully shape corners
- Push lining into bag
- Sew the lining gap closed (hand stitch or machine stitch)
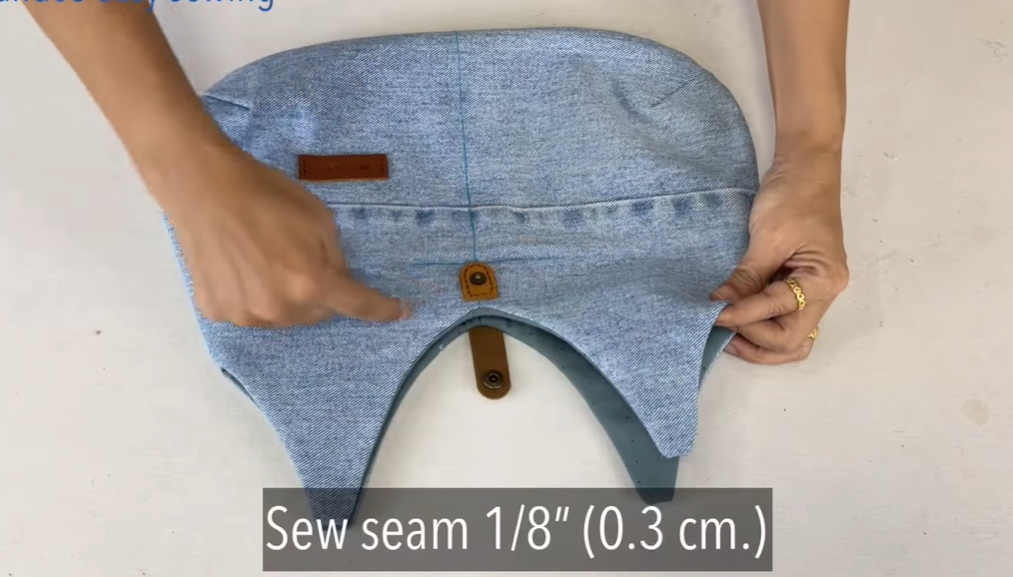
11. Final Finishing Touches
11.1 Topstitch the Opening
Adds strength and clean finish:
- Sew ⅛” from the edge around entire top opening
11.2 Add Structural Support
Optional but recommended:
- Insert cardboard base wrapped in fabric
- Add purse feet to the bottom
11.3 Add Decorative Elements
Transform a simple denim bag into a statement piece:
- Buttons
- Lace trim
- Beads or rhinestones
- Hand embroidery
- Fabric flowers
- Painted designs
- Leather straps or accents
11.4 Iron Everything
Press the bag inside and outside for a crisp, professional look.
12. Creative Variations
1. Boho Fringe Denim Handbag
- Cut long denim fringe
- Sew around edges
2. Quilted Denim Handbag
- Add batting and create quilt lines
- Very stylish and soft
3. Recycled Patchwork Jean Bag
- Use different shades of denim
- Create geometric patterns
4. Jeans Pocket-Front Satchel
- Entire bag front made from multiple overlapped pockets
5. Curved-Top Hobo Bag
- Soft shape using lightweight denim
- Adds drape and elegance
Conclusion
Transforming old jeans into a beautiful handbag is more than just a sewing project—it’s a form of creative recycling that turns worn fabric into something stylish, unique, and practical. Every denim handbag carries its own personality, complete with faded color, original stitching, and charming imperfections that make it truly one-of-a-kind.
With careful planning, simple sewing techniques, and your personal touch, you can create a handbag that’s strong, fashionable, and environmentally friendly.